


Step by step installation instructions for under counter / cabinet LED lighting
A common question for those who are new to LEDs is "how to install LED strip lights under counters and cabinets." The process is easy and has a very similar set of steps in both cases. Even if you do not have advanced knowledge of electronics the project can be done as a DIY project — although it's always a good idea to consult an electrician first before working with electricity.
See also - How to Choose and Install LED Strip Lights Under Cabinets (Updated November 2020)
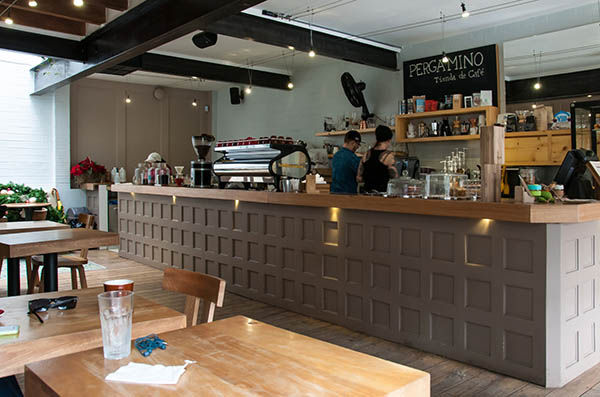
Under Counter Lighting BEFORE Flexfire LEDs:
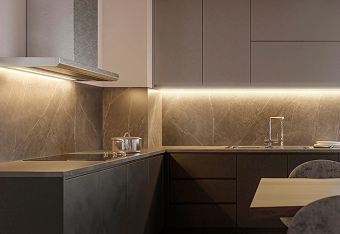
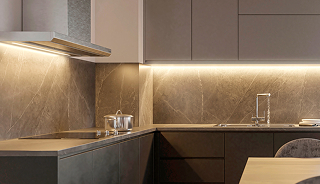
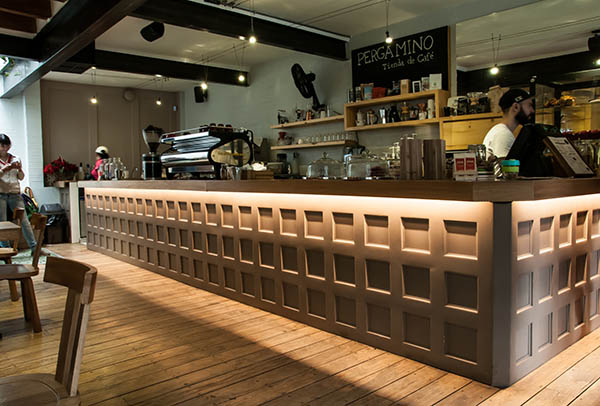
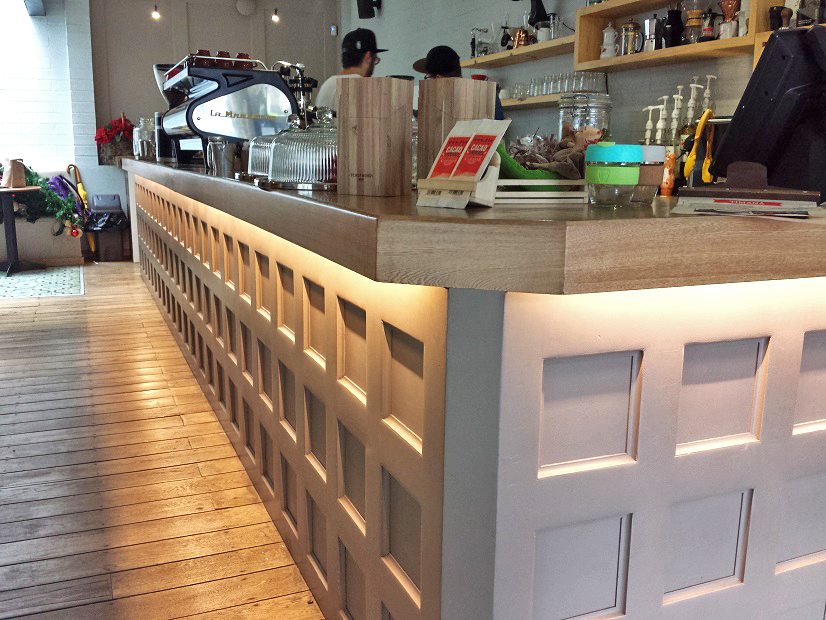
Under Counter Lighting AFTER Flexfire LEDs:
With a little imagination and a clear picture of your project in mind, you can do just about anything with LED strip lights! Flexfire LEDs recently installed dimmable under counter LED lighting at a local cafe. Read on to learn exactly how it was done and gain some knowledge for your next home or commercial business LED strip light installation.
Project: Pergamino Cafe's under counter bar lighting
Pergamino Café serves exceptional Colombian coffee in a friendly, comfortable atmosphere. Since opening in 2012, the cafe has become a popular place for locals to hang out, get some work done, or simply enjoy delicious warm beverages with their friends. When we were first called to install under counter LED lighting at Pergamino Café, we were impressed by the space the owners had created. We decided that by installing Flexfire LEDs ColorBright Warm White strip lighting under the counters would improve the cafe's lighting and provide an even better environment for their customers to enjoy.
The following is a step-by-step documented guide that will walk you through exactly how we installed under counter LED lighting at the Pergamino Café.
Pre installation: Selecting the lights and power supply
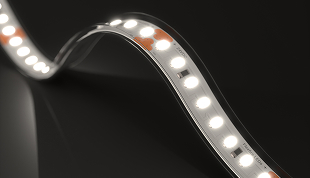
LED strip Lights: You first must choose which color and brightness is needed for the under counter LED strip light installation. While for task lighting and high brightness applications we recommend UltraBright LED strip lights, for accent lighting installations we recommend ColorBright LED strip lights, which feature 600 LEDs per reel and are sufficient for almost all under counter LED lighting situations. It's always recommended to go brighter than anticipated and add a dimmer for greater control. Who knows when you will need that extra task lighting.
We selected ColorBright Warm White LED strip lights because the color matched the existing lighting colors in the cafe (3000k color temperature). Warm color temperatures are great for creating a comfortable atmosphere and promoting feelings of relaxation. Even though ColorBright emits much more light than many other LED strip lights on the market, it is our least bright strip, making it a perfect solution for accent lighting.
Power supply: We have created a chart to help figure out which power unit you will need for your project. View the chart here. We used under two reels (around 28 feet) for this installation. The ColorBright strips use 2.9W per foot. So around 81W in total. Typically, you need to choose a power supply with an extra 20% capacity than the load you are requiring for various reasons, so we selected a 100W 12V Mean Well Unit.
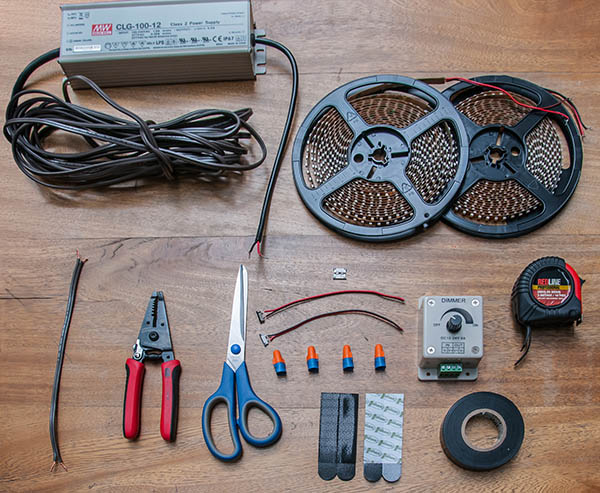
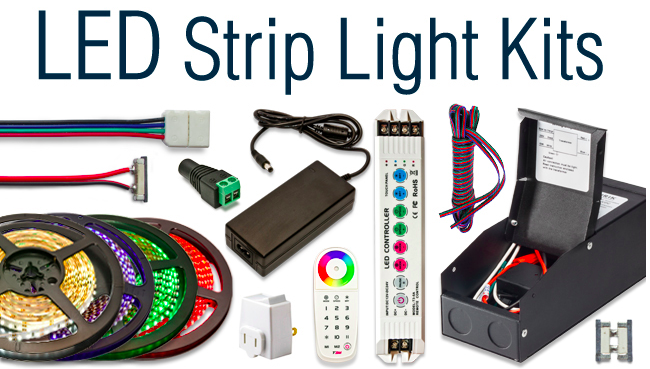
Supplies Used:
- 2 reels of ColorBright Warm White strip lighting (NOTE: This product has been upgraded to our Accent Series with CRI of 98)
- Strip-to-strip solderless connector - (NOTE: This product has been upgraded to our GRIP Connector)
- Strip-to-strip "no wire" solderless connector - (NOTE: This product has been upgraded to our GRIP Connector)
- 100W Mean Well 12v Power Supply
- Cerrowire extension
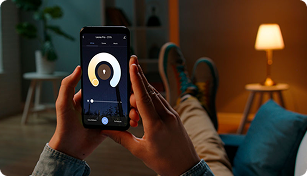
- LED strip Dimmer
- Measuring tape
- Wire strippers
- Sharp scissors
- 4 wire nuts
- 3M Command Hanging Strips
- Black electrical tape
Step 1: Double check your lights before cutting or installing
When installing LED strip lighting under your counters, cabinets, or inside coves, it is very important that you test the LED lights before any installation. Follow the steps below before you cut any of the lights or attach them to any surface.
- Lay out all the products to create a mock installation to make sure you have all the supplies necessary
- Unroll the LED strip lights from the plastic reel
- Attach the uncut lights to the power supply and turn on the power supply
- The strips should light up. If they do not, please check your connections
- Ask yourself - "Are these bright enough?", "Will I need a dimmer", "Is the color perfect for my application?", "Are all the LEDs lighting up and functioning properly?"
When the lights are functioning properly and you are sure you have selected the correct color temperature and brightness for you project, proceed to step two. If they are not functioning as expected, there is usually a simple connection error. We are hereat every step of the way for you to answer any questions.
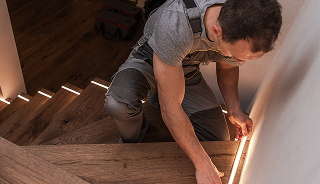
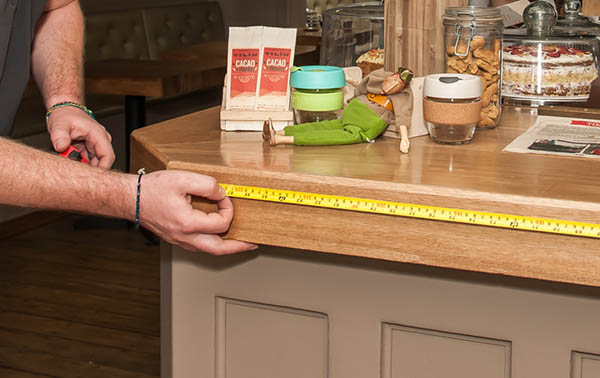
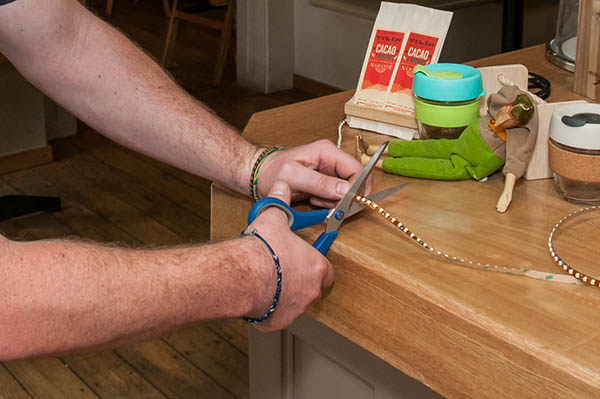
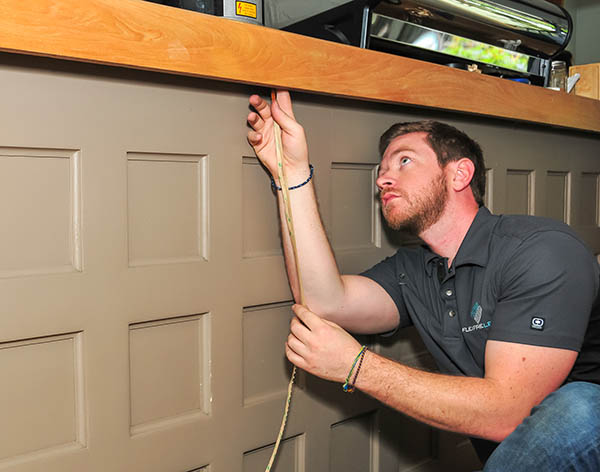
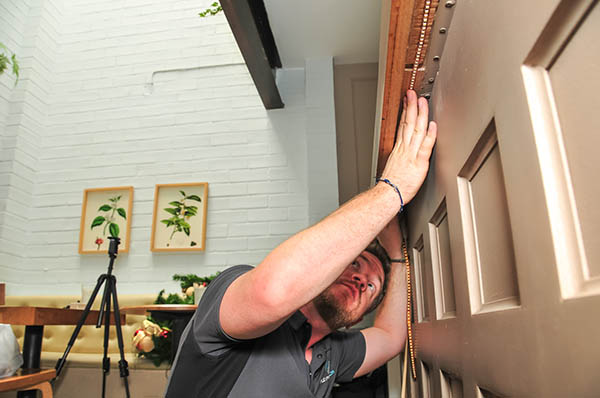
Step 2: Take Measurements and Make Cuts
Flexfire LEDs CEO Brent Mauriello is pictured here measuring the length of the counters where the LED strips are to be installed. Before starting any of the installation process, take careful measurements to determine how many feet of strips will be necessary. Then cut the strips to length with sharp scissors in order to prepare them for the quick installation process ahead.
Note: LED strips can only be cut along the clearly marked lines that are evenly spaced. On this LED strip, the cut lines are after every three diodes all the way down the strip.
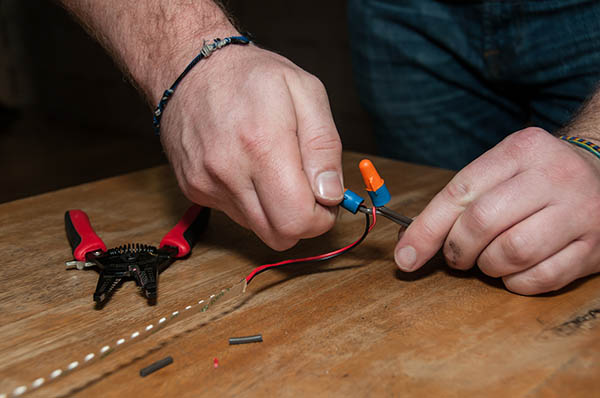
Step 3: Preparing the Strip-to-Power Connection
To attach the first section of lights into the dimmer and power supply, we need to add some length of low voltage extension wire to the end of the first run of LED lights.
Once the low voltage wire is cut to length, strip an inch of wire insulation from the wires coming off the end of the LED strip and the low voltage Cerrowire extension. From there, wrap the exposed wires of the positive/negative cables together, using wire nuts to secure the connection.

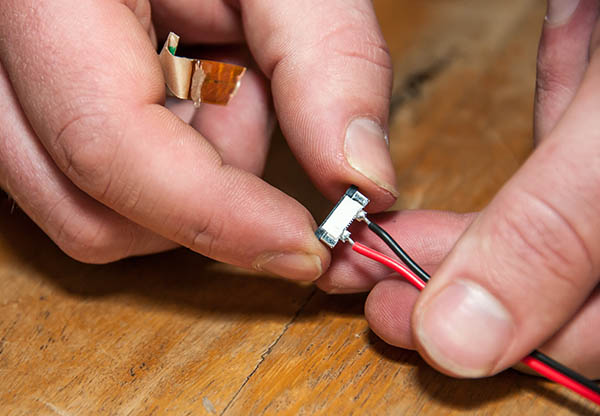
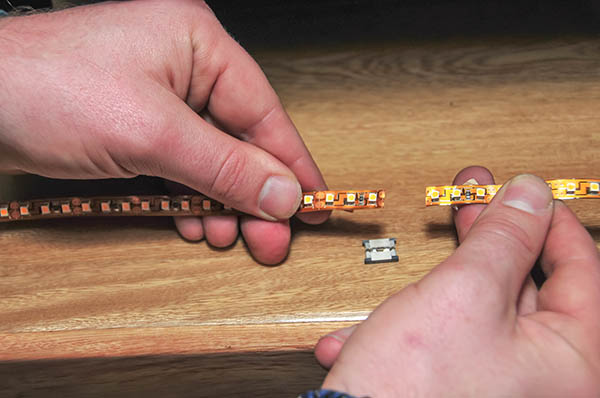
Step 4: Connecting two lengths of LED strips with strip-to-strip connector
In the final photo of the completed installation, you will notice a 90 degree angle at the corner of the bar. To go around this corner, we had to connect the two cut sections of LED strip lights. To do this, we used a strip-to-strip solderless connector to connect the first run of lights to the second.
The next step is to attach the solderless connector to the ColorBright LED strip. To do that just peel back a half inch of the tape cover and the 3M tape on the back, exposing enough space for a connection.
Take the solderless connector and pull out the mounting tray to prepare for attachment. Each solderless connector has two sides. To make sure you have it arranged correctly, ensure that the wider of the white sides faces upward.
Next, GENTLY secure the locking tray back in place over the end of the flexible LED strip. Be gentle and make sure the mounting tray is securely closed, or the lights will not work. Find the positive (+) and negative (-) sides that are marked on the LED strip and note which wires coming off the solderless connectors will carry the negative and positive charges.
Repeat the process to attach the other end of the strip-to-strip connector to the second run of lights.
*NOTE: Red and black wire colors are not always correct indicators of positive and negative. Please look for the positive and negative markings on the strip and associate the wire on that side of the strip to indicate polarity.


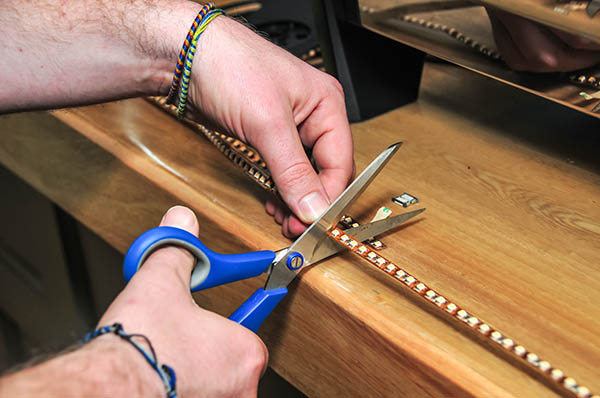
Step 5: Combining strips with Strip-to-Strip "no wire" connectors
For runs longer than 16 feet, we need to connect two separate runs of LED strips. There is no for wire in the middle of the connectors, as we wanted the transition seamless, so we used strip-to-strip ("no wire") connectors to combine the two lengths.
First, cut the strip at a designated line. Peel back the cover as you did to attach the strip-to-strip connector in step 4. Then clip into place the two lengths of strips using the strip-to-strip "no wire" connector, again taking care to create a firm point of contact between the strips and ensuring the positive/negative sides are aligned correctly.

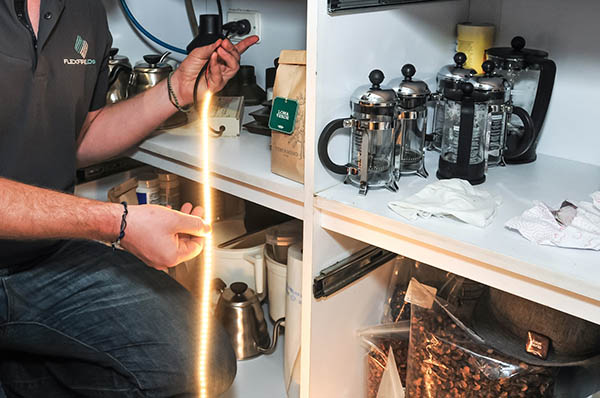
Step 6: Test the Strip (IMPORTANT)!
Use a 2-way terminal block or wire nuts to temporarily connect the full length of LED strip lights with the power supply. If everything is wired correctly, the lights should switch on when the power supply is plugged in. If they don't come on right away at full brightness, check to see that the connectors are solidly attached and that the negative and positive wires are aligned correctly onto the strip.
Note: For more advice, give us a call for free on-the-phone technical consultation at any time during business hours.
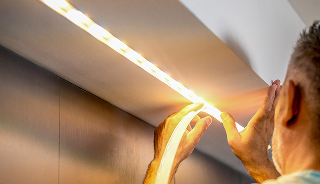
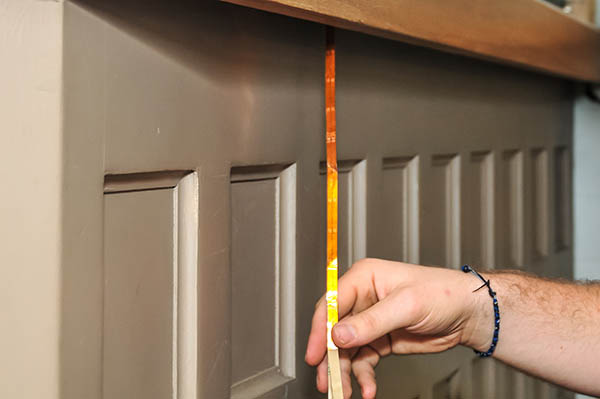
Step 7: Install the LED Strips under the counter
Wipe down the under surface of the counter and make sure it is clean. The 3M take will stick to most non-porous and flat surfaces. For applications under concrete or very rough material, an adhesive may be used. After wiping the under counter clean, peel back the protective cover over the strip's adhesive backing. Run the strip in a straight line under the counter where you want the lights to shine.
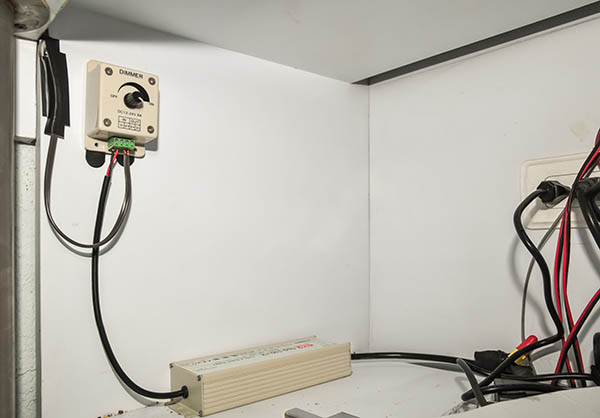
Step 8: Installing the Dimmer
To mount the dimmer to the wall, we suggest using 3M Command Hanging Strips. Next, wire the unplugged power supply into the dimmer by running the wires (the black wire goes in the negative (-) slot and the red wire goes into the positive (+) slot) into the bottom housing on the right side labeled "In". Use a flathead screwdriver to secure the connection. Then wire the Cerrowire into the section of the housing labeled "Out", again using the screwdriver to secure the wires into place.
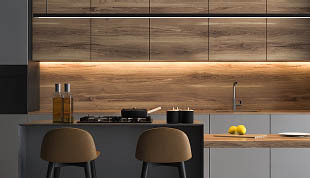
The final result should look something like the photo below.
Step 9: Turn on the Lights!
The last step is the easiest, but also the most fulfilling step in the whole process. Now all you have to do is plug in the power supply, turn up the dimmer to the brightness level of your choosing and enjoy your new under counter LED lighting!
What are the best lighting options for under counters?
Static White Output Options for Under Cabinet Lighting
Outline™ Series Specification Grade LED strip Lights - 1.5 w/ft
- Subtle output for accent and ambient lighting.
- 125 Lumen/ft
- CRI of over 95 for perfect color rendering
- 15-year warranty
Accent™ Series LED Strip Lights - 3.5 w/ft
- Most popular for kitchens and most under cabinet applications. Perfect for accent and ambient lighting - anywhere!
- 250 Lumen/ft
- CRI of over 95 for perfect color rendering
- 15-year warranty
Architectural™Series LED Strip Lights - 4.4 w/ft
- High Brightness professional principle lighting. Get a dimmer to get the best of all worlds
- 500 Lumen/ft
- CRI of over 90 for incredible color rendering
- 15-year warranty
ClickBright™ Light Bars - 4.3 w/ft
- High brightness plug and play light bars. They click together for simple installation.
- 490 Lumen/ft
- CRI up to 98 for perfect color rendering
- 15-year warranty
RGB and Dynamic Tunable White Strip Light Options for Under Cabinet Lighting
RGB Color Changing LED strip lights - 4.4 w/ft
- Control your lights with millions of color possibilities
- Use a remote control, DMX or voice activated system to program
- 15-year warranty
Architectural™ Dynamic Tunable White
- Choose from warm glows to crisp daylight in one room from one strip with a remote control.
- Choose any color between 2700K and 6200K
- CRI over 93
- 15-year warranty
How to Install Under Counter LED Lighting Video
How to start your own under cabinet or under counter project:
1. Determine which brand of lights you will need:
Flexfire LEDs manufactures the highest quality LED strip lights on the planet. We are known in the industry for our amazing support and having the brightest LED strip lights. There are many different types of strips that we carry, each with their particular use. Before you start your project, you will need to select the brightness, color, and style of your LEDs.
Below is a great guide on how to choose the correct LED strip light for your application.
2. Choose one your preferred strip above or choose one of our LED lighting kits
Our LED strip light kits were created with many projects in mind. You can order our pre designed kits with our without a Lutron wall dimmer or the Flexfire LEDs design experts can build a custom kit specifically for your project at no charge!
Any Questions?
Need help on how to install LED lighting under counters or cabinets? We love the opportunity to provide clients with the LED solutions they're looking for. It's such a pleasure for us to see our strip lights installed in the countless innovative and sustainable projects that are developed every single day. Your vision is what inspires us to do what we do!
Do you need any help deciding which LED strip lights are right for your commercial, industrial, or home lighting project? Give us a call at 1-844-FLEXFIRE (1-844-353-9347) or shoot us an email to info@flexfireleds.com and we'd love to lend a hand!