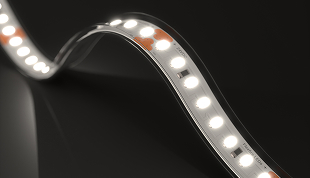


RGB & RGBW Solderless Grip Connectors
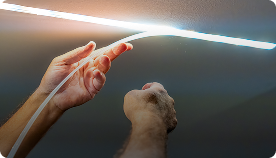
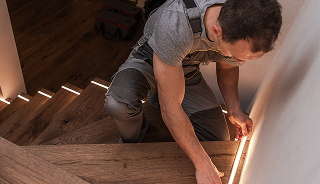
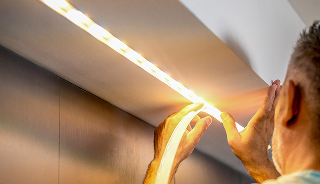
Our new grip strip connectors make installations faster, cheaper and easier than ever. The lightweight yet durable design makes secure connections, so there’s no need for professional tools if you follow our step-by-step guide.
These new solderless connectors come in different lengths so you’ll have more freedom to tweak and expand your lighting projects, while the color-coded wires allow for effortless attachments.
Planning to install outside? Our Outdoor IP65 Grip Connectors are perfect for outdoor projects because they fit snugly inside the silicone end caps that weatherproof your strips.
Features
- Compatible with all IP20 ColorBright™ RGB & RGBW Color Changing LED strips
- Wire length offered in 6”, 12” and 36”
- Comes in a pack of 5 connectors
- Lightweight yet reliable for strong connections
- Effortlessly lets you connect to power, jump gaps, turn corners and attach strips
- Compatible with 10 mm and 12 mm wide RGB & RGBW LED strips
→ Choose the C1 Connector with no wire if you…
- Have your own wire
- Want to connect a wire end to an LED strip
→ Choose the C1 Connector with 12” or 36” bare wire if you…
- Don’t have your own wire
- Want to connect to receivers, power supplies, dimmers, or amplifiers
- Want to attach two C1s together to make a longer C2 connector
→ Choose the C2 Jumper Connector with 6” wire if you…
- Want to connect an LED strip to another LED strip
- Want to go around columns, cross hallways, etc
→ Choose the C2 Corner Connector with no wire if you…
- Want to turn corners
→ Choose the C3 Jumper Connector with no wire if you…
- Want to connect an LED strip to another strip without wire in between
- Want to extend your run lengths for larger projects
Compatible Products
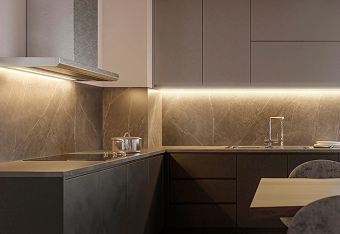
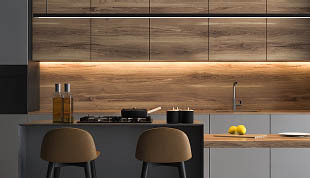
LED Strip Lights
- ColorBright™ RGB 150 Series LED Strip (only IP20 versions)
- ColoRBright™ RGB 300 Series LED Strip (only IP20 versions)
- ColorBright™ RGB 600 Series LED Strip (only IP20 versions)
- ColorBright™ RGBW Series (only IP20 versions)
- ColorBright™ RGB Digital Pixel (only IP20 versions)
Aluminum Mounting Channels
Compatible with RGB & RGBW Connectors
Only Compatible with RGB Connectors
Wire
White CMP Extra Wire 5-Wires - 20/5 - 20 AWG ETL Listed
Specifications
- Grip connectors for 10mm wide strips - Length: 1” (24.3mm) / Width: 9/16” (14.6mm) / Height: 5/16” (7.7mm)
- Grip connectors for 12mm wide strips - Length: 1” (24.3mm) / Width: 11/16” (17mm) / Height: 5/16” (7.7mm)
- Wire length offered in 6”, 12” and 36”
- Wire Gauge: 20AWG
- Connectors without leads can accept 20 to 22 AWG wire gauges
- Amperage maximum: 5 amps
- Works with both 12V and 24V LED strips
Frequently Asked Questions
What are the advantages of solderless connectors?
- No soldering required
- Install LED strip lights in seconds
- Easily attach an additional strip to the run of lights
- Easy to connect and disconnect
Can I load the connectors with more than 5 amps?
It is not advisable to overload the connectors as this will result in future damages to the connectors and your setup.
Which connector should I use to turn a corner?
The C2 connectors are typically used throughout our series for corners, bends and jumps shorter than 6”.
I have a jump longer than 6”, how can I make that extension?
With longer jumps you can splice low voltage wire to the ends of the C1 connectors and extend your run as required. You can secure the splices with wire nuts, crimp connectors, terminal blocks or electrical tape.
What wire should I use to make extensions?
Depending on the series of LEDs you are working with and the length you intend to run the wire, you would need to factor in voltage drop. It is recommended to consult with a qualified electrician which wire gauge would work best for your setup. Connectors come with 20-gauge stranded low voltage wire and can be spliced with any wire your electrician suggests.
Are these connectors a better option than soldering directly to the LED strip?
We always suggest soldering as the best option for a long term solution. Sometimes the connectors can be bumped or knocked off. In high vibration areas, it may cause the connector to come loose from the strip. Soldering is better if your soldering skills are pristine as the solder pads are very small and the solder joints cannot touch.
What do I do If my lights aren't lighting up?
1. The red wire is not always positive! Depending on the side of the LED strip you hook the connector up to, the - or + wires can be a differently assigned color than another connector. Make sure you follow the RGB(W) markings on the strip to indicate which colored wire will be RGB(W) and which will be assigned negative.
3. Also, make sure the flap is closed all the way. If the lights slip out of the connector it is not closed all the way. Be gentle.
4. Check your power supply and make sure it is hooked up correctly and V+ and V- on the LED strips are correctly aligned.
Need assistance with your project or purchase? Our design specialists are ready to help. Contact Us!