


How to Install Stairway Lighting with LED Strip Lights
Installing stairway lighting has never been more simple. In this easy-to-follow guide, you'll learn how to install beautiful stairway lighting with LED strip lights.
We'll guide you every step of the way.
What is Stairway Lighting?
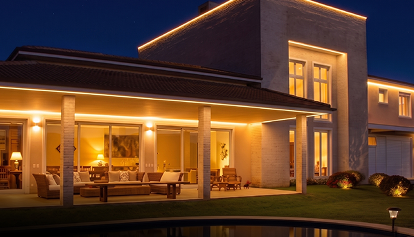
Stairway lighting is a tasteful lighting technique that looks beautiful and serves a functional purpose. The installed lights illuminate the stairs, making an attractive glow while also increasing the visibility of your walkway in a charming manner.
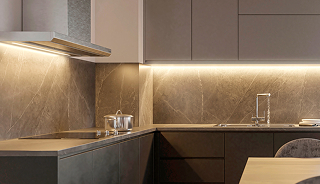
Stairway Lighting with LED Strip Lights
If you’re thinking about installing stairway lighting in your home or business, you’ve come to the right place. Whether this is your first time or you need a refresher, we’ll carefully take you through every step of the process to make it as effortless as possible.
From learning how to choose the best LED strip light for staircase lighting to picking out power supplies, we’ve created an easy-to-follow guide on how to install LED stair lighting.
If you already know which strip type, color temperature, and voltage option you want, you can skip down to step two. If you still need help deciding, continue down below to step one.
5 Simple Steps on Installing LED Stairway Lighting
1. Choosing the Best LED Strip Light for Stairway Lighting
A. Where to Install (Placement)
B. Choosing Brightness for Stairway Lighting
C. Choosing Color Temperature for Stairway Lighting
D. Best Voltage Option for Stairway Lighting
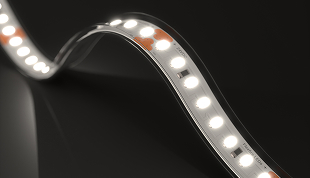
E. Best LED Strip Lights for Stairway Lighting
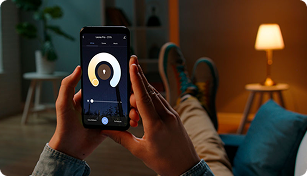
2. Choosing Your Control System
3. Choosing Your Power Supply
4. Solderless Connectors and Wires
5. Mounting and Extrusions
Design Support (Free project design included)
1. Choosing the Best LED Strip Light
First, you need to choose the best LED strip light for your particular project. We’ve narrowed your options to the top three choices for staircase lighting projects that you’ll see down below. But before you can make that decision, here are some questions to consider when choosing the best LED strip light for stairway lighting:
- What is the purpose of the lights - will it be the main source of lighting or do you want to create a particular atmosphere?
- What color temperature do you prefer?
- Where will you install? Do you want to light individual treads or light up the railing?
- Are you lighting hardwood stairs or carpeted stairs?
- Do you want a static white output or a color changing or Dynamic Tunable White output?
- How do you want to control your lights?
- Are you looking for something temporary or prefer a long-lasting permanent fixture?
To help you narrow down the best options, we’ve created a short checklist to help you on the first steps on figuring out LED stairway lighting. If you already know which strip you need for your project, skip ahead to step two to choose your control system.
A. Where to Install (Placement)
There are various ways to install stair lighting with LED strips, depending on what type of stairs you have and where you want to place the lights. First, you need to measure the length of the installation area. If you want very specific placement, you may want a strip light that has frequent cut marks to match your desired length.
Now, you have the option of placing the lights directly under the tread with the LEDs downlighting, which will provide more light. Or you can mount the lights on the frame of the tread with the LEDs facing toward the riser of the stair. This will depend on the type of stairway you have and your preference.
If you have a handrail, you can install below the rail so the light can give an overall illumination onto the whole stairway. This will also give the handrail a pleasant glow. If your staircase has a groove or lip alongside the wall, you can place the lights in there. Look below to see which type suits your project.
A. How to Choose the Appropriate Brightness Levels
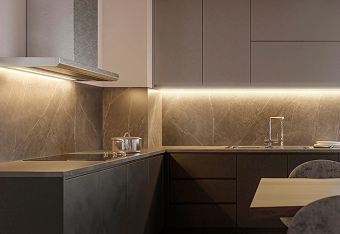
What level of brightness are you seeking? Brightness is measured in lumens, so the higher the lumen output, the brighter the light. LED cove lighting can be broken up into three main types of lighting based on the goal you want to achieve. Lumen needs may vary from project to project depending on the size of the coves and the height from the floor to the cove. However, below is a general guide.
-
- Principle lighting will be the primary source of light and will call for brighter, higher-output strips.
The lumen output you are looking for should be between 400 - 1,000 lumen/ft. - Accent lighting is for aesthetic purposes that draws attention to a particular area, such as highlighting ceiling decor.
The lumen output you are looking for should be between 200 - 500 lumen/ft. - Mood lighting or mood lighting provides a soft, overall illumination that blankets the space.
The lumen output you are looking for should be between 100 - 300 lumen/ft.
- Principle lighting will be the primary source of light and will call for brighter, higher-output strips.
B. Choosing Brightness Levels
Brightness is measured in lumens, so the higher the lumen output, the brighter the light. For stairway lighting, a low or medium-output strip will suffice since the area you’re illuminating is fairly close to the lights and this will not be your principal lighting. On the same note, you may want to lean into lower brightness levels if you plan on lighting up individual treads.
However, if your staircase will be the only source of lighting in the space, you have more leeway on choosing a higher output strip that is suitable for primary or principle lighting.
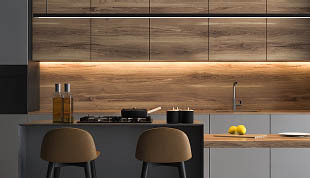
C. Choosing Color Temperature (CCT)
Next is to decide which color temperature, or shade of white light, you prefer. Color temperature is measured in kelvins - the lower the temperature, the warmer the light.
To help narrow down your options to find the best CCT for LED stairway lighting, you can choose between 2700K and 4000K.
D. Best Voltage Option for Stairway Lighting
Many LED strips come in a variety of DC voltage inputs. Most of our LED strip lights are offered in 12V, 24V and 48V DC input versions.
Choosing the best voltage option for your project can actually be very simple. One of the main deciding factors in choosing the voltage of your LED strip light has to do with voltage drop. Voltage drop is the gradual loss of voltage of energy in DC circuits as it flows through the strips of light, meaning you cannot install an infinite run of lights, and that you may get a loss of brightness at the end of a long run of DC input LED strips.
To avoid voltage drop, all of our LED strip lights have been rigorously tested to create the longest run length before a decrease in voltage. This means your strips will maintain their brightness up to the maximum run length.
Choosing voltage options depending on the size and type of your project. But let’s make it even easier for you to decide.
We recommend the 24V option in most LED stairway lighting applications. The 24V version allows you to run more wiring if necessary, such as having a power supply tucked away under the sink or in the basement. Additionally, all of our dimmers and remote controls are compatible with 24V versions.
E. Best LED Strip Lights for Stairway Lighting
Now that you know what level of brightness you need, which color temperature you want, and the best voltage option, you’re ready to pick from our recommended strips for staircase lighting. We have manufactured all of our strips with stairway lighting in mind. The following UltraBright™ strip lights offer similar color temperatures and all offer 24V options.
Additionally, these strips have excellent color rendering and come with a 15-year warranty, which is the longest in the lighting industry.
Best Static White Strip Light Options for LED Stairway Lighting
Outline™ Series
Subtle output for accent and ambient lighting. Great for projects longer than 65 ft.
125 Lumen/ft with a CRI of over 95 for perfect color rendering.
Accent™ Series
Striking, seamless lines of light. Perfect for accent and ambient lighting - anywhere!
250 Lumen/ft with a CRI of over 95 for perfect color rendering.
Architectural™ Series
Very bright and intense lighting. Perfect for principle lighting and commercial applications. 500 Lumen/ft with a CRI of over 90 for incredible color rendering.
Best RGB and Dynamic Tunable White Strip Light Options for Stairway Lighting
RGB Color Changing LED Strip Lights
Control your cove lighting with millions of color possibilities from a remote control or voice activated system.
Architectural Dynamic Tunable White
Choose from warm glows to crisp daylight in one room from the same lighting source with a remote control.
2. Choosing Your Control System
All of our strip lights are fully dimmable. This means you can easily adjust brightness levels to perfect LED cove lighting details, allowing you to switch between bright principle lighting to warm ambient lighting.
To experience the full potential of our LED strip lights, dimmers are highly recommended in cove lighting. Dimmers will also help you save energy by preventing the lights from being on 100% brightness at all times.
If you use the Outline, Accent or Architectural Series, you can choose from these control systems:
Lutron® Wall Dimmers - Convenient wall dimmers to control brightness levels with wireless features
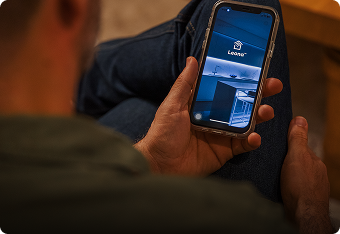
LED Smartphone Controller - Control brightness levels via Bluetooth from your smartphone
Multi-Zone Remote & Receiver Combo - Advanced RF technology lets you program favorite settings on your controller
Touch Series Dimmer - Using radio frequency, you can adjust your lights using a simple dimming wheel
Wireless Wall/Desktop Dimmer and Receiver - Wireless wall-mounted dimmer that’s as easy to use as it is beautiful
If you want the Architectural Dynamic Tunable White Series, you can choose from these control systems
LED Smartphone Controller - Control brightness and color temperatures via Bluetooth from your smartphone
Wireless Wall/Desktop Dimmer and Receiver - Wireless wall-mounted dimmer that’s as easy to use as it is beautiful
Touch RF Remote Controller - Choose your favorite color temperature with this remote using radio frequency
3. Choosing Your Power Supply
A. Choosing the appropriate style of power supply.
The type of LED power supply you need for your project depends on if and how you want to control your lights with a dimming system in your setup. The next step is to choose from our list of compatible power supplies and drivers to turn on your lights.
Quick guideline: If you’re using a Lutron® dimmer or any other AC wall dimmers, you need a Zurik® dimmable driver. You cannot use the Zurik driver with RGB or Dynamic Tunable White systems.
Plug and Play Power Supplies
- Benefits:
- Good for small low-wattage projects
- Great option for those on a budget
- Very easy use to install and use - plug and play
Zurik® Dimmable Driver
- Benefits
- Dimmable with a variety of control systems and triac dimmers
- Great for all size projects
- Long-lasting durability
- Long warranty
*Not for use with RGB or Tunable White systems
Mean Well Hardwired Power Supply
- Benefits
- Great for all size projects
- Long-lasting durability
- Long warranty
- IP65-rated protection
B. Calculating the size of the power supply you need
To calculate the size of the power supply for your LED strip light, you need to calculate the total watts used in your strip. Each strip consumed a different amount of watts per ft (W/ft). Take the w/ft and multiply it by the number of total feet you are hooking up to the power supply. Then, take that number and add an additional 20% to prevent overloading the power supply. It is better to under-load the power supply because it will help increase the lifespan by keeping it cooler.
Check out this in-depth guide to choosing the correct power supply or refer to our power supply calculator chart for a detailed look on which power supply you need.
4. Solderless Connectors and Wires
Installing LED stairway lighting involves some simple handywork. Although soldering is the best way to make long-lasting connections, using solderless connectors to connect LED strips and power supplies is an easier and quicker method.
First, you need to cut your strip light to the desired length. All of our LED strip lights for cove lighting are manufactured with cut marks that are as frequent as every half inch to 4 inches for optimal customization. Using sharp scissors, you can easily cut your LED strip light to the desired length.
Click here to view the solderless connector installation guide.
There are different types of connectors for single-color strips and dynamic tunable strips. Look below to select the proper connectors for your strip.
- Solderless Connectors for Accent, Outline and Architectural Series Strip Lights (Single-Color)
- Solderless Connectors for Dynamic Tunable White Series Strip Lights
If you want to try soldering and would like some guidance, please get additional help from a professional. Or contact our team of experts at (844) 353-9347 who can give you clear step-by-step instructions to make sure you complete the installation in a safe and efficient manner.
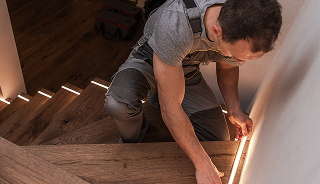
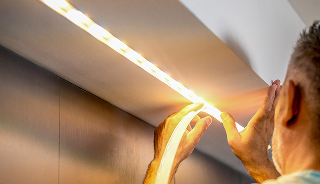
5. Mounting and Extrusions
How to Mount LED Strip Lights
All of our LED strip lights have 3M adhesive backing so mounting will be very easy. The 3M will stick to most non-porous and flat surfaces.
Make sure to thoroughly wipe down the installation area, then carefully peel back the protective cover over the strip’s adhesive backing. Run the strip in a straight line inside the cove.
Using Mounting Extrusions
In LED strip lighting, aluminum channels or extrusions are used for aesthetic and functional benefits. Main benefits of using channels in stairway lighting include preventing spotting and providing the strip lights a professional touch with a more finished look. Extrusions also act as heat sinks and protect the LEDs from dust and debris, lengthening the life of your strip lights.
To make your installation even smoother, we offer channel kits so you get everything you need in one purchase. Try these recommended surface-mounting channels for a “dotless” appearance.
- Best for individual treads
- A surface-mounted channel for recessed installation
- Available in 3 different diffusion levels: Clear, Frosted, and Matte
- 60 degree beam angle
- Best for stair railings
- A shallow, surface-mounted channel with a wrap-around cover
- Available in 2 different diffusion levels: Clear and Frosted
- 110 degree beam angle
You're Ready to Install!
Read the installation instructions below:
Step 1: Create a Mock Installation
When installing LED strip lighting, it is very important that you test the LED lights before any installation. Follow the steps below before you cut the strip lights or attach them to any surface. Make sure to always disconnect the power in your work area, especially if you hardwiring electrical components. Consult an electrician if you have any doubts.
- Lay out all the products to make sure you have all the necessary supplies and components.
- Unroll the LED strip lights from the plastic reel.
- Attach the uncut lights to the power supply. Then, turn on the power supply.
- The strips should light up. If they do not, please check your connections.
- Take a few minutes to ask yourself the following questions to ensure your project comes out perfect: Are all the LEDs lighting up and functioning properly? Are the lights bright enough? Will I need a dimmer? Is this color perfect for my application? Do I have enough tape light?
Step 2: Take Measurements and Make Cuts
Before starting the installation the process, take careful measurements to determine how many feet of strip lights will be necessary. LED strips can only be cut along the clearly marked lines that are evenly spaced. Cut the strips to the desired length with sharp scissors in order to prepare them for the quick installation process ahead. Hold up the strip under the steps or railing where you want to install the lights, and make sure that you have the correct measurement.
Step 3: Prepare the Strips for Installation
After you cut the necessary length of your lights, lay out all all your connectors, aluminum channels, wires, and components. Before attaching the connectors, make sure that the polarity (positive and negative markings on the LED strip) is consistent all throughout the run of lights, connectors, and power supply. If you reverse the polarity, the lights will not function properly.
Once polarity is established, you can make your connections (manual soldering or solderless connectors). Hook up your wires to your dimmer (optional) and power supply. Click here to view the solderless connector visual installation guide.
Step 4: Test the Strip Lights (IMPORTANT)
Once everything is hooked up, you need to power the driver to turn the lights on. If everything is wired correctly, the lights should switch on when the power supply is plugged in. If they don't turn on at full brightness right away, check to see that the connectors are solidly attached and that the negative and positive wires are aligned correctly onto the strip, and that the dimmer is set to the maximum setting.
Unplug your power supply and turn off the electricity in the installation area to ensure safety. Always seek the advice of an experienced electrician before doing any electrical work.
Note: For more advice, chat with us or give us a call for free on-the-phone technical consultation at any time during business hours.
Step 5: Mount Your Lights
Wipe down the installation area to make sure it is clean before you install the strip lights.
The 3M tape will stick to most non-porous and flat surfaces, so after wiping down the surface area, peel back the protective cover over the strip's adhesive backing. Run the strip in a straight line under the treads or railing.
If you are using aluminum channels, prepare the channels to be mounted under the stairs. Peel the beginning of the wax paper covering the adhesive off of the LED strip, and lightly press the the tape down onto the channel - starting at one end and pressing down every 1/2" as you continue. Rather than taking the whole cover off of the strip at once, peel it back slowly as it is being placed onto the surface.
Secure all cables, wires, and make sure that everything is complete before powering the lights on.
Step 6: Turn On the Lights!
The last step is the easiest and most satisfying part of the whole installation process. All you have to do now is plug in the power supply, turn up the dimmer to the brightness you prefer, and enjoy your beauitful stairway lighting!
Free Design Support
Whether you have a question or need general assistance, we’re here to help! Check out this section on installing LED strip lights at home for cove lighting DIY or contact us and get an answer within 24 hours.
Free Project Design
We offer free design support! That’s right, our team of lighting specialists and design experts will work with you one-on-one to create your dream project, no strings attached.
Chat
Chat with one of our lighting designers on the bottom right hand of the screen to get an expert consultation in minutes!
Call
Call us at (844) 353-9347 Monday through Friday 6AM - 4PM (PT).