


LED Troubleshooting Hub
Having Issues with Your Setup? Let’s Fix It!
LED Troubleshooting Hub
Having Issues with Your Setup? Let’s Fix It!
Getting started with LED lighting? Between all components and connections, we know it can be a bit tricky at first. That’s why we put together this guide: to help you tackle some common issues on your own. But don’t worry—if things still aren’t clicking, we’re always here to lend a hand.
Let’s walk through each part of your setup with easy starting guidelines and step-by-step fixes for specific cases:
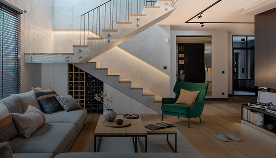
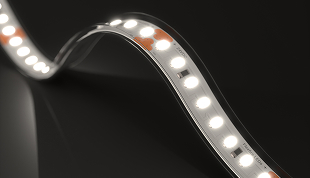
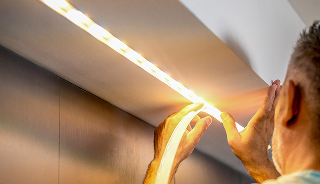
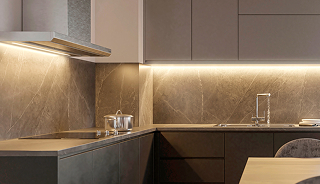
LED Strip Lights
Keep in mind that each segment of an LED strip—the portion between cut marks—operates on its own. That means if one segment is damaged, it won’t necessarily affect the others. So, it’s possible to see some segments fully lit, others dim, and some completely off.
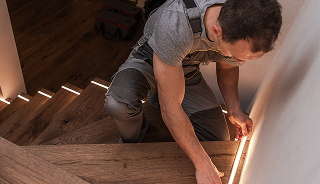
Before jumping into troubleshooting, take a moment to review the spec sheet for your lights, as it contains helpful information you may need. Always disconnect power before working on any electrical connections, and if you're ever unsure or uncomfortable with wiring, it's best to consult a qualified electrician.
My Entire Strip Won’t Turn On
It’s rare for a whole LED strip to fail. Most issues come down to simple fixes—usually a loose connection, product mismatch, or power supply problem. Start by identifying the most likely cause below, then follow the steps under that section:
Mismatched Polarities
-
- Trace the polarity markings—positive (+) and negative (−)—from the strip through to your connectors, power supply, and controller (if used) to ensure that the positive and negative wires are connected correctly.
- In most cases, if the lights don’t turn on, it’s due to crossed wires somewhere in the circuit.
Loose or Faulty Connections
-
- Make sure connections are tight and secure.
- Try exposing a bit more of the stranded wire out of the wire jacket so it makes better contact with the terminal of the controller or power supply.
Incorrect Input Voltage
-
- Look for a 12V or 24V voltage label on your strip or its packaging. Do the same for your power supply. It should match the strip’s voltage exactly.
- Make sure your strips are being fed DC constant voltage, not CC constant current power. You can verify this by checking the label on your power supply—it should say “Output: 12V DC” or “24V DC” and include the words “constant voltage.”
Overloaded Power Supply
-
- Confirm the total load of LEDs and the wattage capacity of your driver. You might have connected too many strips or exceeded its maximum capacity.
Circuit Power Issue
-
- Double-check that the circuit breakers haven’t tripped.
There’s A Dead Segment On My Strip
Dead segments usually appear near connection points. Start by identifying the most likely cause below, then follow the steps under that section:
Connector Damage
-
- Look for loose or corroded connections, as well as broken LEDs, next to the connector's caps.
- Be careful not to damage the first LED next to a solder pad on your Sienna™ or tunable white strip. This can happen if you cut both solder pads right under the grip connector.
Installation Damage
-
- Handle your LED strips carefully during installation. Physical impact on the LEDs or resistors can cause damage and affect performance.
- Look for any missing LED, broken resistor, or indentations along your strip.
Water or Moisture
-
- Especially with outdoor strips, be mindful of water exposure, as corroded connections between LEDs can lead to dead segments. Water damage often appears as dark, black, or brown areas.
- To spot issues, inspect the strip while it’s turned off and look closely for any segments that appear faulty or burnt out.
Paint On the LED Strip
-
- If you’ve intentionally or accidentally painted over your LED strips, the affected segment will not turn off completely but will display a different hue or color temperature. To fix this, disconnect the lights first, then gently clean the strip using isopropyl alcohol (90% or higher) and a Q-tip to remove the paint.
- Before and after cleaning, check the strips with the lights off and on to spot any foreign materials like paint or primer that might be affecting the light.
Bad Soldering
-
- If you soldered the strip yourself, a dead segment might just mean the connection needs a quick touch-up. Check your solder points and redo them if needed.
- But if the issue is at a factory joint, it could be a faulty strip—we’ll help you with a return.
Factory Issue
-
- Sometimes, a manufacturing issue—usually near a factory solder joint—can cause dead segments right out of the box. That’s why we recommend testing your LED strip as soon as you receive it.
- If only specific segments on your strip are out, it’s likely an issue with those particular sections, either due to rare factory defects or accidental damage during handling. Please send us clear, high-quality photos so we can help diagnose the issue.
My LEDs Are Flickering
Start by identifying the most likely cause below, then follow the steps under that section:
Overloaded Power Supply
-
- Add up the total wattage of your LED strips. You’ll usually find the watts per foot listed on the product label or spec sheet—just multiply that number by the total length you're using.
- Then, check the wattage rating on your power supply. It's typically printed right on it.
- If your LED load is close to or higher than what your power supply can handle, that’s likely the cause of flickering.
- If you’re using a Class 2 universal driver, keep in mind that each set of output wires provides a maximum of 60W or 96W, depending on the voltage. Be sure not to exceed the recommended limit for any one set. Overloading can lead to performance issues or shorten the life of the driver.
Incorrect Input Voltage
-
- Look for a 12V or 24V voltage label on your strip or its packaging. Do the same for your power supply. It should match the strip’s voltage exactly.
- If you have one, a multimeter can confirm your power supply is producing the correct voltage.
- Make sure your strips are being fed DC constant voltage, not CC constant current power. You can verify this by checking the label on your power supply—it should say “Output: 12V DC” or “24V DC” and include the words “constant voltage.”
Loose or Faulty Connections
-
- Look over all connection points—from the power supply to the wires, the wires and the strip, and between strip sections.
- Make sure no wires are loose. If you're using screw terminals, double-check that they’re tightened.
- Watch for signs of corrosion, rust, or buildup on wires or connectors, as these can cause problems.
- If using grip connectors, peel back a bit of the adhesive at the strip’s tip before inserting. This makes room and ensures the connector makes proper contact with the strip.
My Dimmer Switch Might Not Be Compatible
-
- Check the kind of dimmer you’re using. If it’s an AC dimmer, it’ll be connected before the power supply; if it’s a DC dimmer, it'll be connected after the power supply.
- If you're using an AC dimmer switch, check that it works with LED lighting. Some older dimmers are designed for incandescent bulbs.
- The dimmer must also support the wattage load of your LED setup—note that LED loads are rated differently than incandescent ones.
- If your lights flicker when dimmed low, see if you can adjust the Trim.
- The Lutron® Hi-Lume is less compatible with wall dimmer switches.
My LED Strip Arrived Damaged
-
- Before assuming the strip itself is the issue, ensure that you've ruled out all the causes mentioned above.
- Check your LED strip closely for any cuts, burn marks, or damaged chips.
- If you have another LED strip that you know works, swap it in temporarily to test. If the flickering or issue goes away, your original strip may be the cause of the problem.
- It’s not usual, but factory defects do occur. If you suspect this is the case, we’ll be happy to take a look—just send us a few clear photos of the strip.
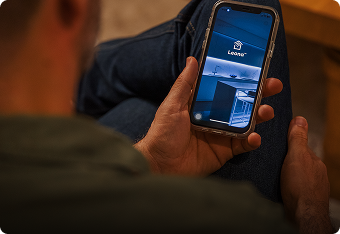
Leona® Controller
Before jumping into troubleshooting, we recommend reviewing the spec sheet for your controller, as it contains helpful information you may need. After that, go through these basic checks:
Inspect the Wires
-
- Double-check all the wires and connections. Ensure everything is plugged in securely. If you see any loose wires, plug them back in.
- Be sure the wires are connected where they’re supposed to be and that everything matches correctly (voltage, polarities, etc.) Check the wiring diagram if you need to.
- If you have a multimeter handy, check continuity and voltage.
Match the Leona Controller with Your LED Strip Type
-
- Look at the RUN light on your Leona® Pro controller. The color tells you what mode or LED strip type it’s set to.
- If the RUN light is steady (not blinking), press and hold the MATCH/SET button. The light will change colors one by one. Each color means a different kind of LED strip:
-
- White or teal means single-color lights
- Yellow or light green means tunable/dynamic lights
- Red means RGB lights
- Green means RGBW lights
- Blue means RGB + dynamic tunable white lights.
-
- Keep holding the button until the light shows the color for your LED strip. For example, if you have an RGBW strip, wait for green. If you have a tunable strip, wait for yellow or light green.
- When you see the right color, release the button. Then, press the MATCH/SET button again to save your choice. The light will turn solid to show it’s set. For RGBW, the light should turn dark green.
Test Each Part
-
- Try testing each part of the lights separately. This will help us figure out where the problem might be.
- You can bypass the Leona® controller and connect the LED strip straight to the power supply. That way, you can see if each color lights up.
- If your strip has different sections, test each one by itself to see if it works.
- If you have a multimeter handy, check that electricity is flowing through the wires. If you don't have one, that's okay! We can still figure it out.
- If yours are colored lights (like RGB), test red, green, and blue one at a time to make sure each color works.
I Can’t Get the App to Connect
If the Leona® app says it’s taking too long or keeps timing out, don’t worry. Here’s what you need to do:
Check Your Wi-Fi
-
- Ensure you’re typing the correct Wi-Fi password. Double-check for any typos! If the password is incorrect, the controller will not connect and will time out.
- Leona® controllers only work with 2.4 GHz Wi-Fi, not 5 GHz. Most routers have both, so be sure your phone is also connected to the 2.4 GHz network during setup. Trying to use 5 GHz will cause the controller to time out. If you're unsure which one you're using, your internet provider can help.
- Turn your phone's Wi-Fi off and back on, or try "forgetting" your Wi-Fi network and then reconnecting to it.
Add the Controller Manually
In the app, tap the "+" button, then choose "Lighting." Next, select "Strip Light (Wi-Fi)" and follow the steps shown.
Restart the Controller
Unplug the Leona® controller for 3 seconds, then plug it back in. This puts it into pairing mode.
Delete Your Previous Leona® Pro Controller Connection
Tap on the controller in the app, then tap the pencil icon. Scroll down and choose “Remove this device” and then “Disconnect and wipe data.”
Pair It Again
After that, unplug the controller for about 1 minute before trying to pair it again:
-
- Open the app and tap the “+” button.
- Choose “Lighting,” then “Strip Light (Wi-Fi).”
- Pick your 2.4 GHz Wi-Fi network and enter the password.
- When the app instructs you to, unplug and plug back in the controller (or quickly turn it off and on three times).
- Make sure the lights are flashing.
- The app will scan and set things up. It may take a moment.
- When it’s done, give your lights a name you’ll remember!
My Lights Aren’t Working Right
Start by identifying your particular issue, then follow the steps under that section:
Blue doesn’t work on RGB lights
-
- Check if your Leona® Pro is set to DNY mode. This setting turns off the blue channel.
The lights don’t remember the last settings after using a wall switch
-
- Make sure your controller is set to the correct light type. That’s how settings are saved.
The controller keeps going offline in the app
-
- It might be your Wi-Fi signal. If it’s weak, try moving your router closer or using a Wi-Fi extender.
Mixing old and new Leona® controllers
-
- Try to avoid it. If you add a newer controller to a setup with older ones, they might not work together. In that case, it's best to update all of them.
The lights stay on after turning them off with the app or remote
-
- See which color stays on. If it's always the same one, that connection might be the problem. Try connecting a different color to that spot to test.
The colors look wrong
-
- Test red, green, and blue one at a time. If, for example, you pick red and see purple instead, the wires might be crossed.
- You can also bypass the controller and wire your LEDs straight to the power supply to check if the strip is working correctly.
There are issues with Leona® and single-color lights
-
- If your lights turn on but won’t dim, double-check the wiring.
- If the RUN light is flashing blue, that usually means a short circuit. The RUN light should remain solid when everything is working properly.
I Have Problems with My Remote
Start by identifying your particular issue, then follow the steps under that section:
The remote isn’t working
Unable to delete a remote
-
- Press and hold the "MATCH/SET" button on the controller for 20 seconds to unpair all remotes.
LED Power Supplies
Before jumping into troubleshooting, we recommend reviewing the spec sheet for your power supply, as it contains helpful information you may need. If the product still isn’t working after trying the recommendations below, we’ll help you start a warranty claim.
Just remember: Always turn off the power before working on any electrical connections. And if you’re ever unsure about wiring or anything else, it’s a good idea to check in with a licensed electrician.
My LEDs Are Flickering, or My Power Supply Buzzes or Hums
Start by identifying your particular issue, then follow the steps under that section:
Connecting too many lights to one power supply
-
- If your lights are flickering, it might be because the power supply is overloaded. Double-check the total load of LEDs and the wattage capacity of the driver.
- Remember: For Class 2 Universal Drivers over 96W, each output wire can only carry up to 96W. You’ll need to use multiple wires for bigger setups.
Mismatched LEDs and Power Supply
-
- The voltage of the power supply should match the voltage of your LED strips.
- Make sure the power supply is giving the correct voltage and current for the strip. If possible, use a multimeter to test its output voltage.
- Remember: Flexfire lights only work with constant-voltage power supplies.
Loose or Damaged Connections
-
- Loose or corroded connections—and even short circuits—can lead to flickering, so double-check all wiring points for secure, clean contact.
- Tighten or replace connectors if needed.
- Make sure you remove the adhesive backing slightly at the tip of the strip before inserting it into the grip connectors.
Incompatible Dimmer Switch
-
- If you're using an AC dimmer switch, check that it works with LED lighting. Some older dimmers are exclusively designed for incandescent bulbs.
- The dimmer must also support the wattage load of your LED setup—note that LED loads are rated differently than incandescent ones.
- If your lights flicker when dimmed low, see if you can adjust the Trim.
- The Lutron® Hi-Lume is less compatible with wall dimmer switches.
My LEDs Don't Turn On
It’s rare for all segments of an LED strip to fail. Most of the time, the issue is a simple fix—it’s usually related to power, connections, or compatibility. Identifying your particular issue, then follow the steps under that section:
Polarities or Voltages Don’t Match
-
- Double-check that the positive and negative wires are connected correctly at the power supply, controller (if used), and LED strip.
- Make sure the voltage of the power supply matches the strip’s voltage.
Loose Connections or Unfixed Connectors
-
- Ensure all wire connections are tight and secure.
- Try exposing a bit more of the stranded wire out of the wire jacket so it makes better contact with the terminal of the controller or power supply.
- If using solderless connectors, make sure they’re closed completely. The strip should feel tight and secure, not loose.
My Power Supply Isn’t Working
Before proceeding with specific troubleshooting, start with a basic power test:
Check Voltage
-
- Confirm correct voltage and current from the power supply using a voltmeter or multimeter.
Confirm Polarities, Connections & Dimmer Compatibility
-
- Double-check that the positive and negative wires are connected correctly at the power supply, controller (if used), and LED strip.
- Make sure connections are secure.
- If you're seeing flickering or strobing, confirm that the dimmer you're using is compatible with your LED setup. An incompatible dimmer can cause those issues or even short-circuit the system.
Match the Load
-
- Make sure your LED load falls within the minimum and maximum range allowed by the power supply.
Inspect the Driver
-
- If everything else looks good and the lights still aren’t turning on, inspect the power supply for any visible damage or signs of overheating. Also, make sure there’s enough airflow around the unit in your install—some warmth is normal, but it should never be too hot to touch.
Find model-specific notes below:
Zurik® ELMV2 Dimmable Driver
-
- Our units have protective plastic covers over connections. Use a small screwdriver to remove them, then connect your LED strip wires to the green terminals underneath.
- When hardwiring to 120V AC or a dimmer, the ground wire can be capped off. These units feature reinforced insulation and don’t require grounding.
Zurik® Universal Dimmable Driver
Some of our Class 2 drivers have multiple sets of output wires. Each set supports up to 96W. If your LEDs are flickering, ensure they have enough power.
Mean Well® Driver
-
- Double-check that the circuit breakers haven’t tripped.
- Check voltage output and wiring against the unit’s printed diagram.
- If your strip lights require constant voltage, check that the power supply hasn’t switched to constant current mode, which can happen if the unit is overloaded. If a multimeter confirms it is, disconnect the power supply from AC power for 20 seconds, then plug it back in—just be sure the unit isn’t overloaded again, or it will switch back to constant current mode.
- Triac dimmers aren’t compatible with this product and will cause flickering or strobing. If you’re using an in-line dimmer, RGB remote, DMX system, or similar, be sure the setup isn’t overloaded beyond its maximum amperage capacity.
- Review our Mean Well® Installation Guide if needed.
- Remember: Wire colors may not follow NEC standards.
Plug-In Power Supply Adaptor (DPS)
-
- DPS units have small built-in knobs on the bottom to create airflow underneath. Make sure these are resting against the installation surface to prevent overheating. Overloading the unit can also lead to excessive heat and reduce its lifespan.
- Check for a blue or green LED indicator on the power supply; it should light up when plugged in. If it doesn’t, test the outlet to ensure it’s providing 120V AC, either with a voltage tester or by plugging in another device.
- If the indicator doesn’t turn on, the issue could be a tripped circuit, a loose AC plug, or an outlet that isn’t receiving power—sometimes it's tied to a wall switch. If you're using a surge protector, double-check that it’s switched on.
- If the outlet works and the indicator still doesn’t light up, the unit is likely dead and needs to be replaced.
Still Experiencing Issues?
If the steps above didn’t solve it, don’t worry. Let us help finish it.