


How to Install LED Shelf Lighting in a Living Room?
When learning how to decorate living room shelves, don’t overlook high CRI lighting! Discover shelf lighting possibilities for your living room objects.
- -Shelf lighting enhances the visibility and aesthetics of your curated objects while creating a more inviting atmosphere in your living room.
- -High CRI (90+) lighting is essential for accurately displaying colors in your decor.
- -LED strip lighting and puck lights are great DIY options for achieving both recessed and surface-mounted lighting under your shelves.
You’ve spent years curating your living room: the first-edition books, the hand-painted ceramics from that trip to the coast, the framed family photos that always make you smile when passing by—whatever it is that reflects your taste and tells your tale to guests and visitors.
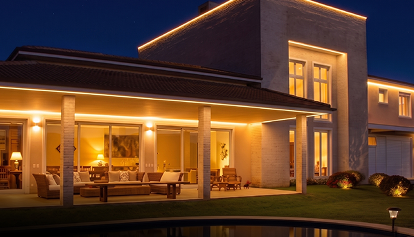
But when the sun goes down, all that character tends to disappear into the shadows. Your standard overhead chandeliers or dome lights may be great for taking a nap on the couch or as a backdrop for a phone call, but they’re terrible at telling your story through objects or adding depth to your space. That's where LED shelf lighting comes in.
It is one of those rare DIY wins that feels like a professional renovation without the hefty price tag. It transforms a flat, wooden plank into a stage for your possessions. Whether you’re looking to highlight specific treasures or just want to stop using the "big lights" in the evening, this blog teaches you the basics of living room shelf illumination.
Is It Worth Having Shelf Lighting in the Living Room?

Before you grab a drill, it helps to understand what you’re actually gaining from this kind of installation. Shelf lighting isn't just about visibility; it’s about benefits like atmosphere, utility, and self-expression:
- Elevating Your Collection: Most of us have a favorite object on our shelves—a vintage camera, artwork from our children, or a particularly handsome set of encyclopedias. Shelf lighting provides accent lighting, which draws the eye directly to these focal points. It creates depth, making the room feel larger and more museum- or gallery-like.
- Setting the Mood: When you switch off the ceiling lights and turn on your shelves—along with floor and table lamps—the room’s energy shifts instantly. This is mood ambient lighting at its best. It provides a soft, low-level glow that’s perfect for movie nights, deep conversations, or a quiet glass of ginger ale. It’s enough light to move around safely, but not enough to ruin a cozy time.
- DIY Your Space Your Way: A decade ago, integrated lighting required a custom cabinet maker and an electrician. Today, high-quality LED components are designed for homeowners like you. You can achieve a built-in project look over a single weekend with basic tools, making it one of the highest-impact, lowest-cost upgrades you can do.
What is the Best Lighting for Living Room Shelves?

Not all LEDs are created equal. If you buy the first cheap roll of tape you find online, your living room lighting might end up looking like a discount pharmacy.
After all, you wouldn’t choose your shelves that way. You’d take the time to compare materials—skipping flimsy particle board in favor of solid oak or rich walnut—thinking about finish, durability, and how it elevates everything placed on it. The same logic applies to the lighting you install around them. That's why you should focus on these four pillars:
2700K vs. 3000K: Warmth & Consistency

When choosing lights to showcase objects on your shelves, white light is almost always the best option. Not only is it the tone under which other colors appear most faithfully—where the green or gray of your indoor succulents actually looks green or gray—but it also feels the most natural in a living room setting. But how do you choose white for a space?
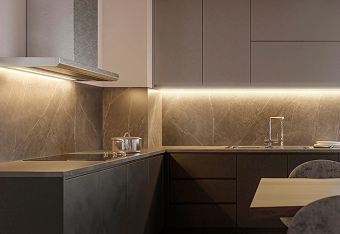
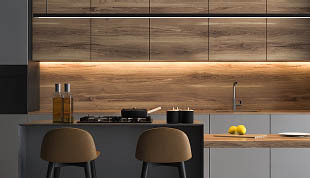
First, the ideal white tone for a living room is typically warm white, around 2700K to 3000K, or even up to 3500K. Since the living room is primarily a space for comfort and relaxation, warmer tones work best because they resemble traditional bulbs, which themselves mimic the glow of candlelight. There’s a reason cozy living rooms so often revolve around fireplaces!
Second, think about the color temperature of the other lights already in your space—or the ones you plan to install. The goal is consistency. Your shelf lighting should match, or at least closely complement, the rest of your living room lighting applications. You don’t want the lights under your fireplace mantel to look clinical and icy while the ones beneath your sofa feel overly amber and sleepy.

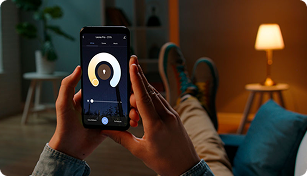
Ideally, the best solution is a tunable white system. Since it lets you adjust between warmer and cooler shades of white, it gives you far more flexibility: you can fine-tune the lighting to match the rest of your setup later on, take advantage of the strengths of each tone (for example, cooler whites are great for cleaning because they reveal dust better), and even enjoy some of the benefits of circadian lighting!
High CRI (90+)

Whether it’s a collection of iridescent Morpho butterfly wings or hand-painted handicrafts, we all have objects whose colors need to truly stand out to be appreciated. After all, why invest in beautiful shelf decor or artwork if it’s going to look dull and lifeless once the sun goes down?
This is where a high Color Rendering Index (CRI) becomes essential. It measures how accurately and "good" an object looks under LED light. For shelf display lighting, you should aim for a CRI of 90+ so art pieces and collectibles look rich, vibrant, and true to life. You’ll usually find this rating listed on the product box or spec sheet.
Surface Mount or Recess Mount

There are two main ways to install lighting on your shelves. One is simpler to pull off, while the other creates an even more seamless, built-in look in your space:
- Surface-Mounted: The easiest if you’re a DIYer. The light track is screwed or attached directly to the underside of the shelf. If the shelf is at or below eye level, you’ll want to hide the track behind a small piece of trim (a "valance").
- Recessed: This is the gold standard. You use a router to cut a shallow groove (a dado) into the shelf, and the light sits flush with the wood. It’s completely invisible until you turn it on.
How to Put Lights in Shelves?
Whether you are working with a built-in bookcase or a set of minimalist floating shelves, there’s always prep work to be done. Follow these expert tips based on your setting:
- Type of Wood: Be gentle. Hardwoods like oak or walnut can splinter if you use a dull bit, while MDF can crumble if you over-tighten screws. Always pre-drill your holes.
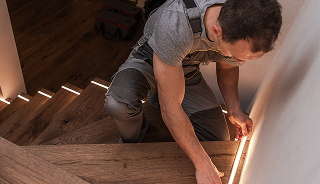
- Type of Shelf: Floating shelves are trickier because you have to hide the wires inside the shelf itself or behind the wall bracket. For standard shelves with side barriers, you can easily hide wires by running them through small holes drilled in the back corners.

The LED Light Installation Item Checklist
To bring this living room LED installation setup to life, your shopping (or “I think I already have this somewhere in the garage”) list should look something like this:
☐ LED Light Source (LED Strips or Puck Lights)
☐ LED Power Supply (Plug-In or Hardwire)
☐ Dimmable Controller or Smart Plug
☐ LED Aluminum Mounting Channel (for Strips)
☐ 20-Gauge Low-Voltage Wire
☐ Wire Strippers and Electrical Tape (or Solderless Connectors)
☐ Drill and ½-Inch Spade Bit
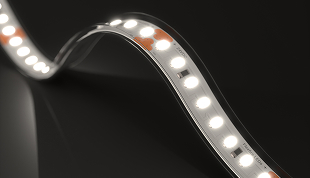
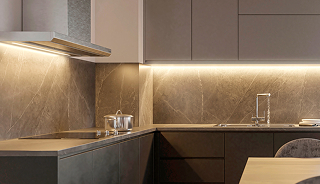
Option A: LED Accent Light Strips (Modern Linear Lighting)

Premium, white accent strip lights are perfect for providing a wash of light across the entire length of a shelf. It’s a modern, clean look that works beautifully for uninterrupted long rows of decor or objects without gaps in between: vinyl records, coffee-table or regular books, magazines, DVDs and Blu-rays, collector’s box sets, board games, and more. Follow these installation steps:
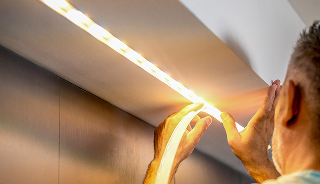
- Measure and Cut: Measure the internal width of your shelf, then cut both the LED strip and the aluminum mounting channel to size. Most strips include marked cut points every few inches along copper pads. If you’re recessing the setup, cut—or have a professional cut—the corresponding grooves into the shelf first.
- Test Before Mounting: Before sticking anything down, plug the strip into the power supply and test it. It’s much easier to catch polarity or connection issues now than after installation.
- Mount the Channel: If you’re not recessing the setup, stick or screw the aluminum channel about 2 inches back from the shelf’s front edge. This front-loading placement helps the light wash over the front of your books and decor rather than illuminating only the back wall.
- Place the Strip: Peel the adhesive backing and firmly press the LED strip into the channel.
- Run the Wiring: Drill a small hole in the rear corner of the shelf and feed the wire through toward the power supply, typically hidden at the top or bottom of the unit.
- Snap on the Diffuser: Attach the frosted cover onto the channel. This softens the light, hides visible LED dots, and helps protect the strip from dust.
- Plug In and Fine-Tune: Turn everything on and make any final brightness or color adjustments. Once the shelves are styled again, the lighting should feel subtle—not overpowering—while still making your objects stand out.
Why It Works: It eliminates shadows. Because the light runs the full width, every object is illuminated from multiple angles.
Option B: Puck Lights (LED Spotlights)

With their round shape and compactness, puck lights provide a scalloped light pattern. Instead of a flat wash, you get focused beams that highlight individual items. This is a more traditional, art-gallery style, ideal for items that stand out on their own, even if they're part of a series or collection: deluxe mineral specimens, a table clock collection, 18th-century vases, and more. Installation goes as follows:
- Plan Your Placement: Unlike LED strips, puck lights work best when they’re centered above the objects you want to highlight. In most shelves, placing one puck every 12-24 inches creates an even, balanced look without overlighting the space.
- Choose Your Mounting Style: Decide whether you want the pucks to be recessed or surface-mounted. Recessed pucks sit flush with the shelf for a cleaner, built-in appearance, while surface-mounted ones are easier to install and slightly more decorative.
- Mark and Drill: Mark the center point for each puck light. If installing recessed fixtures, drill the appropriate cutout for each light. For cleaner cable management—especially with surface-mounted models—drill a small hole in the shelf directly behind the fixture location so the wire can pass discreetly through the surface.
- Test the Lights First: Before mounting everything permanently, connect the puck lights to the driver and make sure each one turns on correctly.
- Mount the Pucks: Secure the fixtures according to their mounting type. Recessed pucks usually clip or slide into place, while surface-mounted models typically attach with screws or a mounting ring.
- Manage the Cables: On the top or hidden side of the shelf, use cable clips to keep wires neat and tight against the wood. If the shelves sit at eye level, consider adding a thin false bottom or cover panel to conceal visible wiring.
- Connect to the Driver: Link all the puck lights to a central hub or 3-way splitter connected to the main power driver. Try to position the driver somewhere hidden but still accessible for future adjustments.
- Turn Them On and Adjust: Once everything is connected, test the final setup and reposition decorative objects if needed. Properly placed puck lights should create focused highlights without harsh glare or visible hotspots.
Why It Works: It creates high contrast. The areas between the pucks remain slightly darker, which creates a dramatic, moody atmosphere. It’s fantastic for deep shelves with specific trophies or art pieces.
Final LED Tips & More Shelf Lighting from Flexfire!

Installing LED shelf lighting is about more than just seeing your stuff—it’s about how the space feels when you’re in it, surrounded by the things you love. By choosing high-CRI lights, planning your installation carefully, and taking the time to hide your wires, you can turn a simple storage unit into a true architectural feature that adds warmth, depth, and personality to your living room.
But before you call the project finished, there are a few last-minute details that can make the difference between a setup that merely works and one that truly feels polished. So before you put the drill away, keep these final tips in mind:
- Do the Sofa Test: Before finalizing the position of your lights, sit in your favorite spot in the living room. Can you see the bare LED strip or the underside of a puck light? If the glare hits your eyes directly, move the fixture slightly closer to the front lip of the shelf or add a small trim piece to conceal the line of sight.
- Avoid the “Rat’s Nest” Effect: Nothing ruins a sleek shelf faster than a tangle of visible wires. Use cord concealers or paintable cable raceways to keep everything neat. And if you’re doing this during a remodel, even better—run the wires behind the drywall for a fully integrated look.
- Layer Your Shelf Lighting: You don’t have to commit to a single type of lighting. A soft LED strip can provide the overall glow, while a puck light highlights a specific collectible, candle, or framed object. This layered approach is one of the easiest ways to make shelves feel more custom and professionally designed.
Start with just one shelf or bookcase. Once you see how much warmer, cleaner, and more personal your living room feels, you’ll probably start eyeing every other shelf in the house for a lighting upgrade. And if you want help exploring the possibilities, you can always contact Flexfire to help bring your shelves—and your own story told through objects—to life.
