


A Simple Guide to Living Room Lighting: Installing LED Strips
Transform your living room with light! Explore how light strips serve as LED ceiling lights and decorative lighting to elevate your space effortlessly.
- -LED strip lights offer versatile and stylish solutions for enhancing living room lighting, catering to various activities and moods.
- -Strategically placing light strips behind the TV, along shelves and coves, and under furniture and mantels can elevate living room ambiance while providing practical benefits.
- -A living room strip lighting project can be DIY or require a professional—it all depends on expertise, following the installation steps correctly, and having all the must-haves on hand.
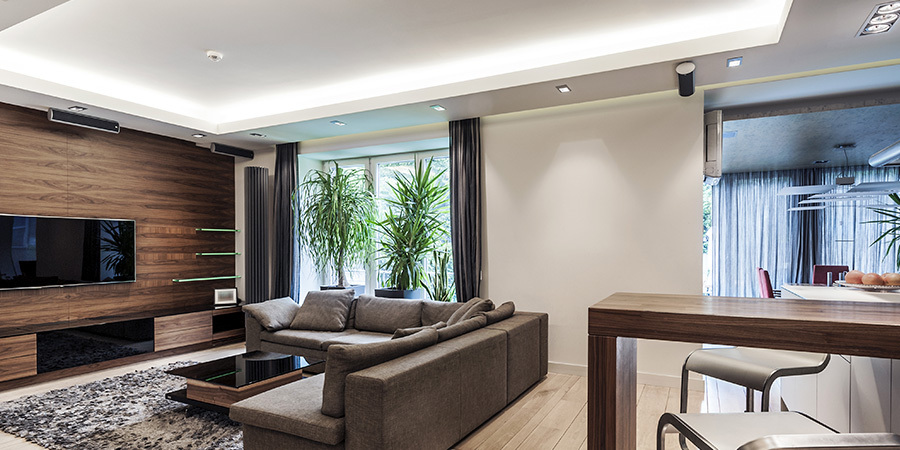
Your living room is the center of the home spatially and functionally, which means it's where you do most things: binge-watch shows, display artwork, enjoy board game nights, sit by the fireplace, have meaningful conversations, host vibrant parties, work, and occasionally nap.
That kind of versatility can make living room lighting a bit of a hassle—because a single overhead dome light just doesn't cut it for all those different moods and activities.
However, thanks to the flexibility and DIY friendliness of most LED strip lights, it doesn't have to be. If you've seen those sleek, glowing entertainment centers or bookshelves on social media and wondered how to get that look without a ton of effort, this blog is for you.
We've worked with LED tape for a long time and have learned that the living room comes with its own set of quirks. Here's how to install LED strip lights in your living room step by step, so it actually looks professional.
Phase 1: Map Your Zones for Living Room Lighting
Before you buy anything or settle on a specific LED tape model, walk into your living room and look for the "shadow traps." These are the spots where light goes to die—where overhead glow doesn't reach or where you have special items or decor you want to highlight. They're your best candidates for purpose-built strip lighting.
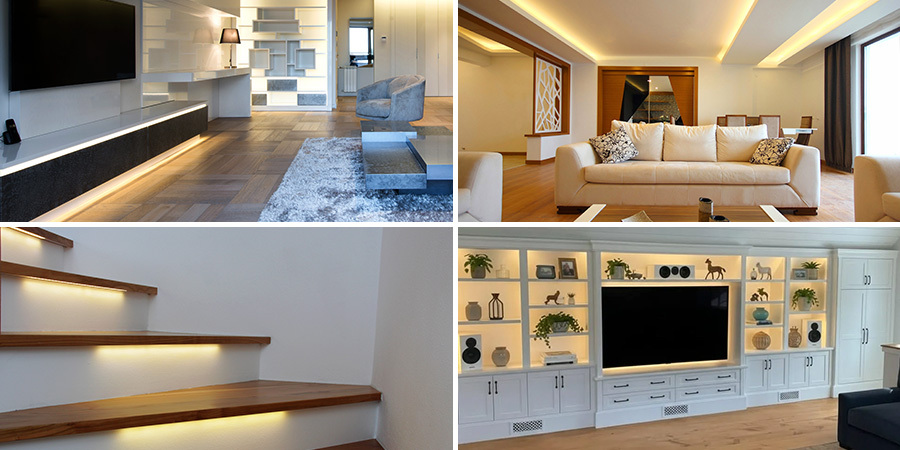
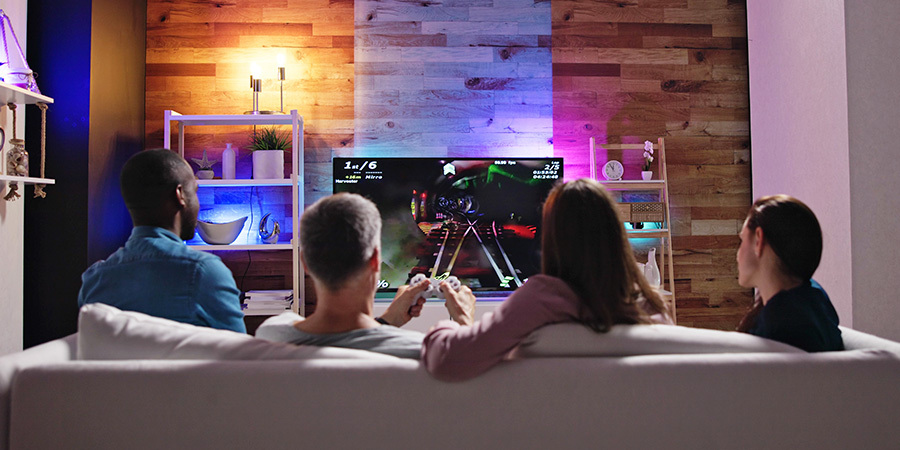
1. Built-In Entertainment Center or Floating TV Console (Bias Lighting)
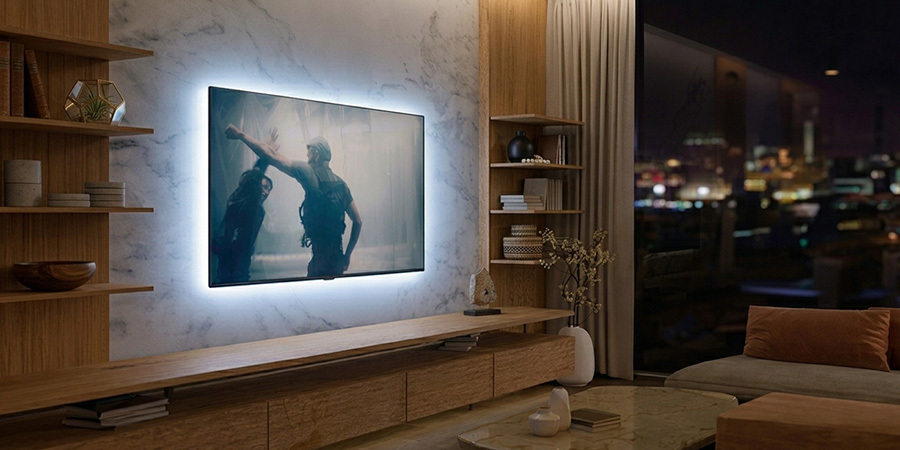
Usually, the TV tends to be the focal point of this space—whether it's on, drawing attention with its vivid, moving images, or off, thanks to its size and the look of the entertainment center it sits on. Either way, adding light behind it helps ensure it contributes to the overall experience of the room in both situations.
However, sticking LED strips behind your TV isn't just for show or for creating flashy effects during those Dune or Harry Potter marathons. They also help reduce eye strain when you're watching in the dark, making things easier on your eyes, while subtly illuminating wood finishes, colors, and nearby objects beneath your setup.
- Real-Life Tip: If your TV is mounted on a dark accent wall, a cool white light strip will make the screen stand out and prevent the wall from looking like a black hole.
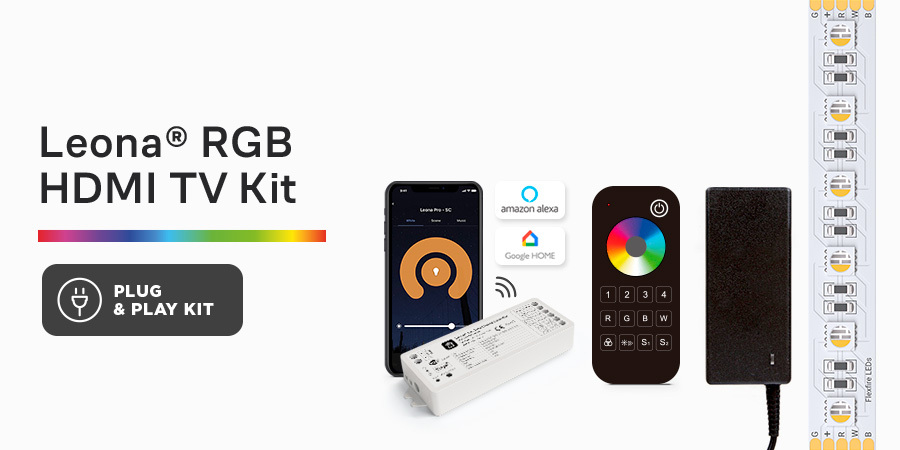
- Our Flexfire Recommendation: The Leona® RGB HDMI Sync Box TV Kit.
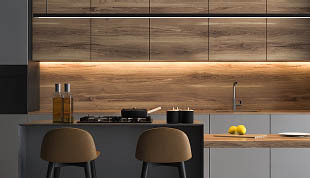
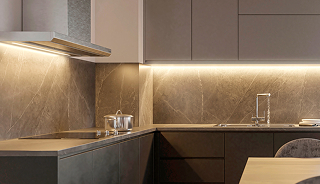
2. Wood Floating Shelves & Bookcases (Accent Lighting)
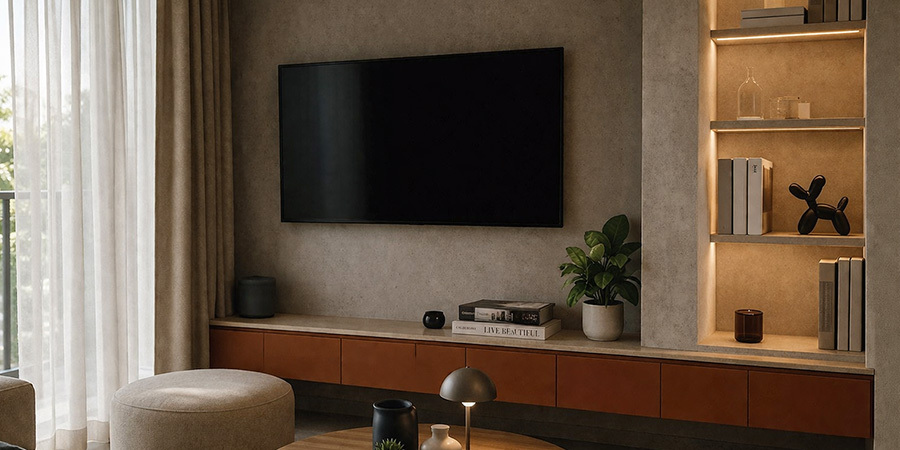
Got a collection of colorful novels or indoor plants? Running a strip along the underside of each shelf, especially if it's hidden in a recessed groove, creates depth and makes the hues of family portraits, pottery, mini-sculptures, mineral collections, DVD and Blu-Ray titles, and other objects pop and add vibrancy to the mood of your space.
- Real-Life Tip: Most living room shelves have a "lip" at the front. Hide the strip right behind that lip so you see the glow on the books, not the bright LED chips themselves.
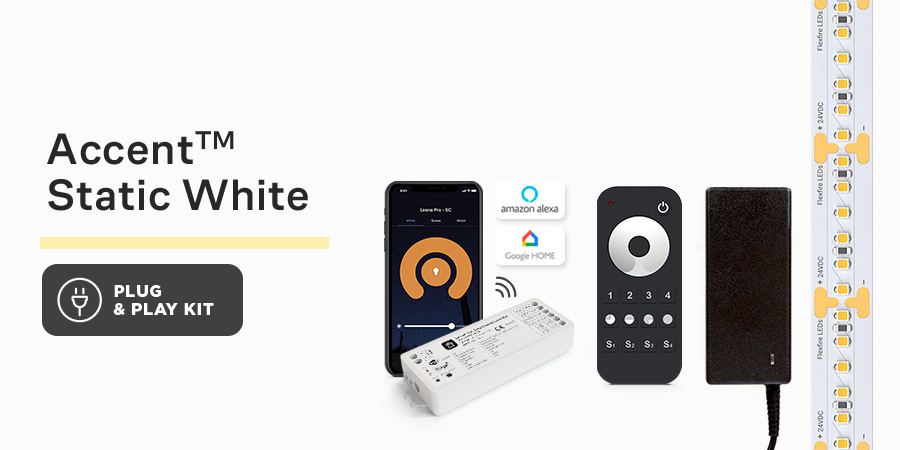
- Our Flexfire Recommendation: Accent™ Lighting Plug and Play Strip Light Kit.
3. Under Sofa Sets & Living Room Center Tables (Toe Kick Lighting)
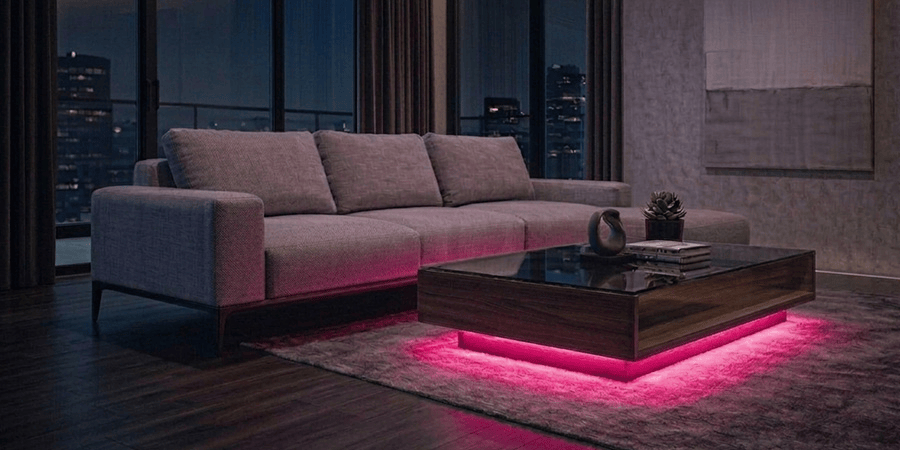
On the one hand, this is the ultimate colorful party trick. Running a strip along the bottom frame of your sofa and other furniture makes these heavy structures look like they're floating. On the other hand, this is also great night-light insurance by providing just enough light to find your remote or a snack without tripping over a rug or the coffee table in the dark.
- Real-Life Tip: For a perfect hover effect, inset your light strips 1–2 inches from the edge of sofas or coffee tables—this creates a soft, even glow. Remember that placing them too close to the edge causes glare, while tucking them too far in muffles the light.
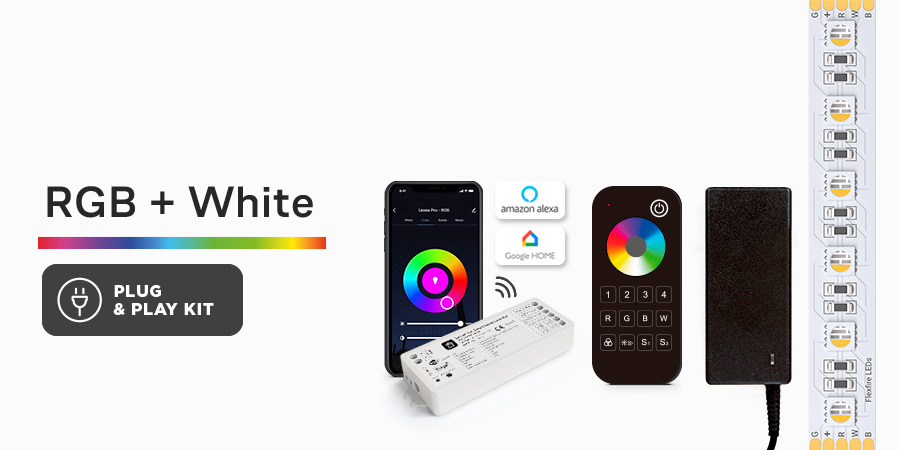
- Our Flexfire Recommendation: RGBW Color Changing Plug and Play Strip Light Kit.
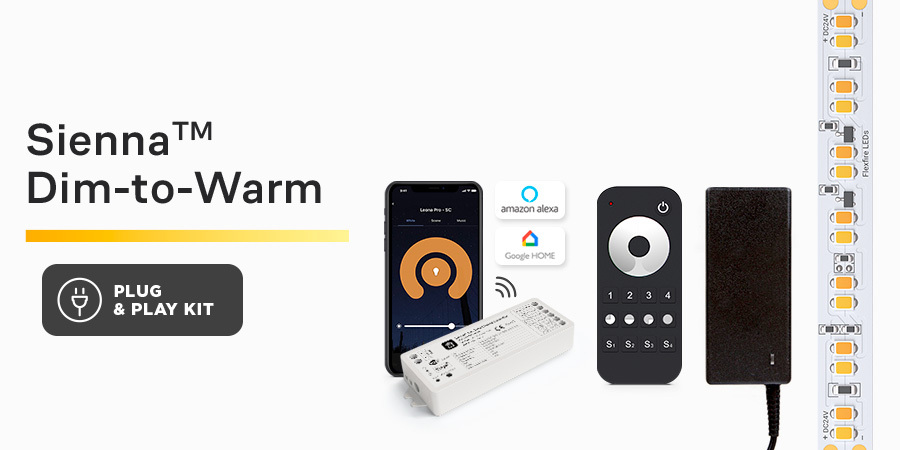
4. Under or Along Fireplace Mantels (Mood Lighting)
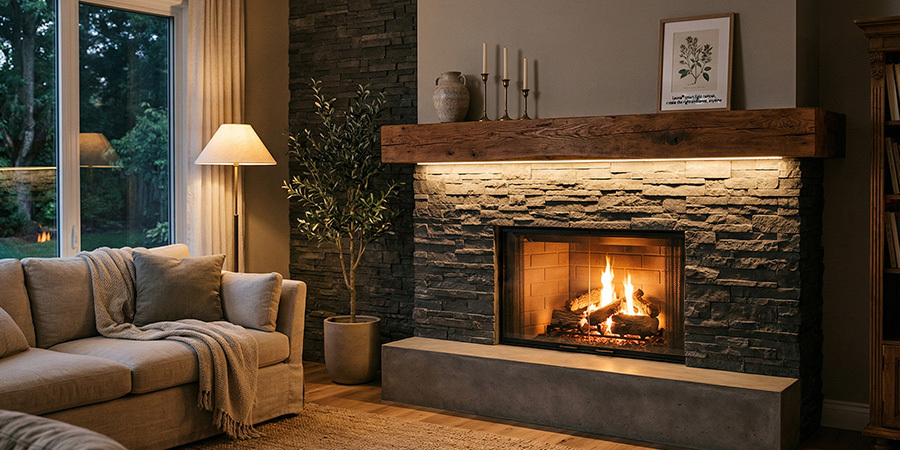
The amber glow of a lit fireplace—or even the surrounding area when it's off, still brought to life by framed photos or festive stockings—pairs beautifully with light in a similar color temperature. Think candle-like, ultra-warm illumination that sets the stage for storytelling, maximum comfort, and an overall mood of rest, family, and relaxation. That's why a recessed LED strip along a wooden mantel, casting light upward or downward, is a perfect addition to this space.
- Real-Life Tip: Only consider this for mantels that aren't too close to the firebox. Beyond safety, placement direction also shapes the effect: uplighting enhances the wall and objects, while downlighting highlights the texture and materials of the fireplace itself.
- Our Flexfire Recommendation: Dim-to-Warm Plug and Play Strip Light Kit.
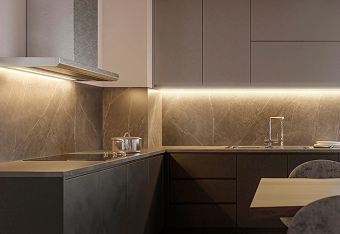
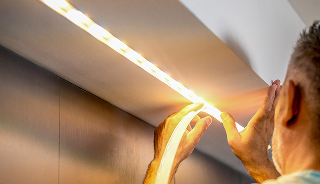
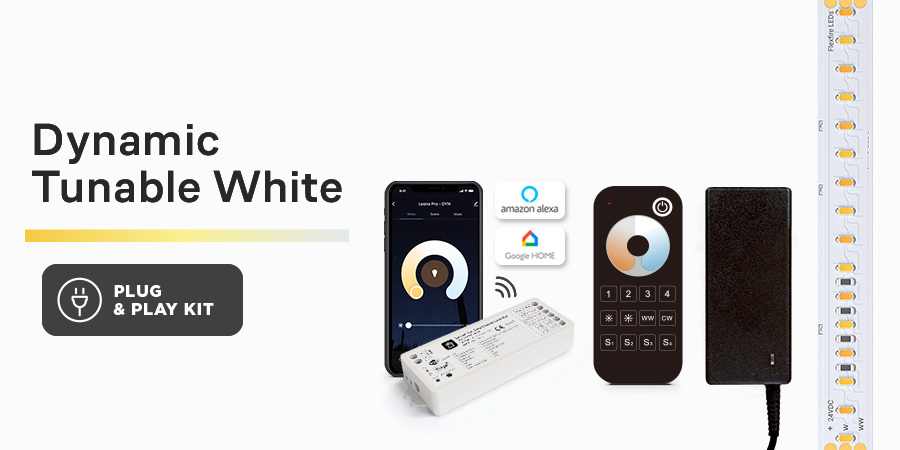
5. Inside a Ceiling Cove or Crown Molding (Ambient Lighting)
Tucking an LED strip into crown molding or a ceiling cove creates that indirect glow you usually notice in high-end spaces like hotel hallways and Beverly Hills mansions, but can't quite point to. Instead of lighting the room directly, it bounces light off the ceiling, making everything feel taller and more open—relaxed and quietly elevated—no harsh glare, no visible source, just atmosphere. It is a great substitute for harsh overhead lighting as well.
- Real-Life Tip: Leave some distance from the ceiling—even an extra inch or two helps the light spread more evenly and avoids harsh bright lines. Also, keep the line continuous; breaks or gaps in the strip are much more noticeable under indirect lighting.
- Our Flexfire Recommendation: Dynamic Tunable White Plug and Play Strip Light Kit.
Phase 2: Prepare Your Living Room Lighting Toolbox
Just like you'd gather everything you need to host a memorable get-together in your living room, it helps to approach an LED strip lighting project with the same mindset. Whether you're taking the DIY route or bringing in a professional, two things don't change: you don't need a full workshop, but there are a few non-negotiables, and you should always choose durable, premium LED products backed by solid support. Your list should include:
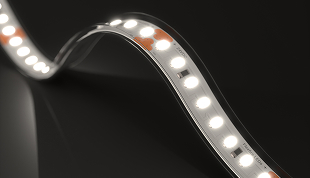
1. High-Quality LED Light Strips
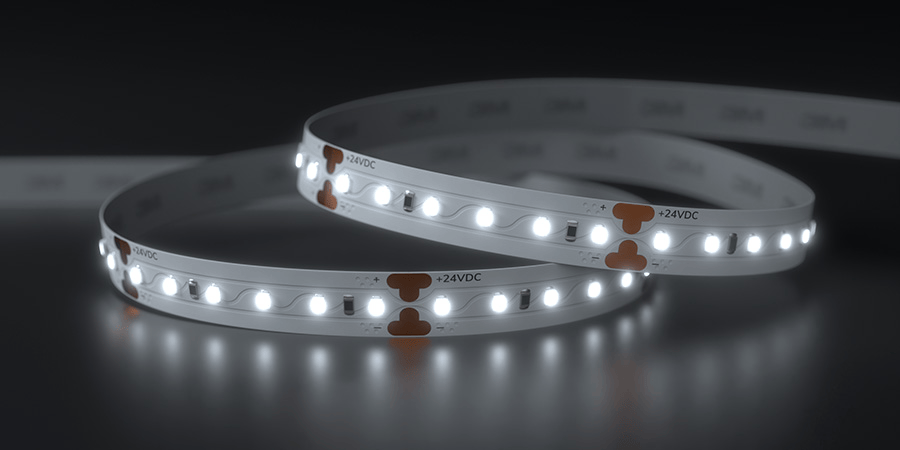
This is the foundation of your living room lighting project—if the strip itself looks cheap, no amount of clever placement will save the result. High-quality strips give you consistent brightness and longer lifespan, which is especially noticeable in a space where you actually spend a lot of time relaxing, working, or with those you love.
This is exactly what you should look for in terms of correlated color temperature, voltage, color, and other technical specs:
- High CRI (90+): A color rendering index closer to 100 ensures colors (wallpaper, flesh tones, wood, fabrics) look vibrant rather than washed out.
- White Light (3000K or Tunable White): 3000K keeps things ready for everyday occasions; tunable lets you shift to a cooler setting for daytime productivity and a warmer one at night for relaxation.
- RGB (If Used): Best reserved for mood lighting, parties, dancing moments, or themed and holiday accents—not as your main lighting layer.
- 24V Systems: More stable brightness over longer runs, fewer voltage drops, and cleaner, more professional results.
Overall, if you want to keep things simple and future-proof, go for an all-in-one LED strip that offers both tunable white (all shades from warm to cool) and thousands of color options. It gives you the flexibility to handle everything—from everyday needs to more expressive, mood-driven gatherings—without needing multiple products or upgrades down the line.
2. LED Power Supply

Often overlooked, but absolutely critical. A good power supply with matching voltage ensures your LEDs run smoothly, without flickering, buzzing, or premature failure. It also needs to be properly sized for your setup: too small and you'll get performance issues; too large and you're wasting space and money.
As a recommendation, plan where this goes early. Tuck it behind a media console, inside cabinetry, along the back of a sofa, or anywhere it's hidden but still accessible if needed. Nothing breaks the illusion faster than a bulky power brick sitting in plain sight.
3. Dimmer Switch for LED Lights or Any Other LED Controller
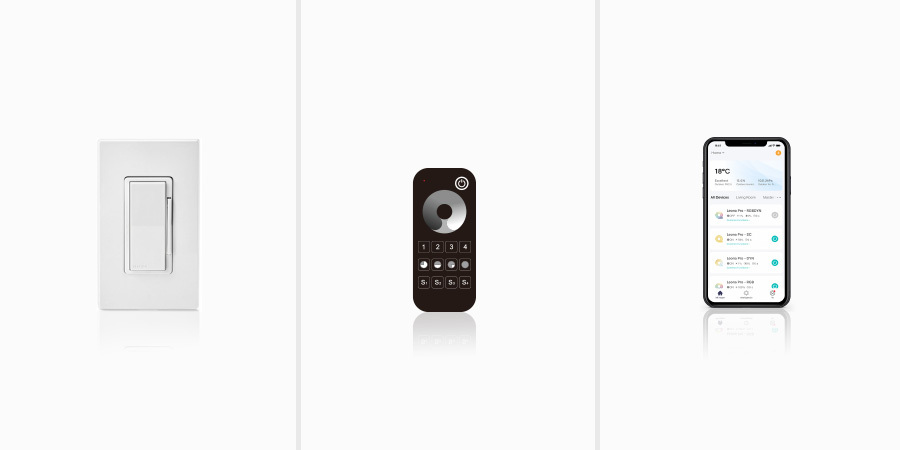
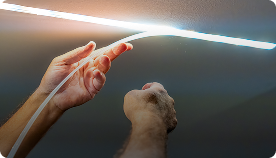
No matter how well you place your lighting, it needs to adapt to real life. And that's where control comes in! Depending on your LED strip model, a dimmer or controller—whether it's a wall panel/dimmer or remote—lets you shift your lighting from bright and functional (cleaning, hosting) to soft and ambient (sleeping guests on a sofa bed, winding down) in seconds.
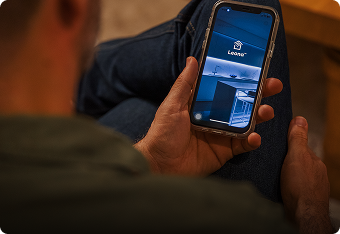
Smart app control, in particular, makes it easy to fine-tune brightness, adjust color temperature, or set scenes without getting up. Imagine watching game shows very late at night with a strip that's just a bit too bright or wanting to switch to cool white to a fuchsia glow for a spontaneous dance with your partner. When you can just grab your phone and adjust things instantly, everything falls into place.
4. Aluminum Extrusions (Optional)
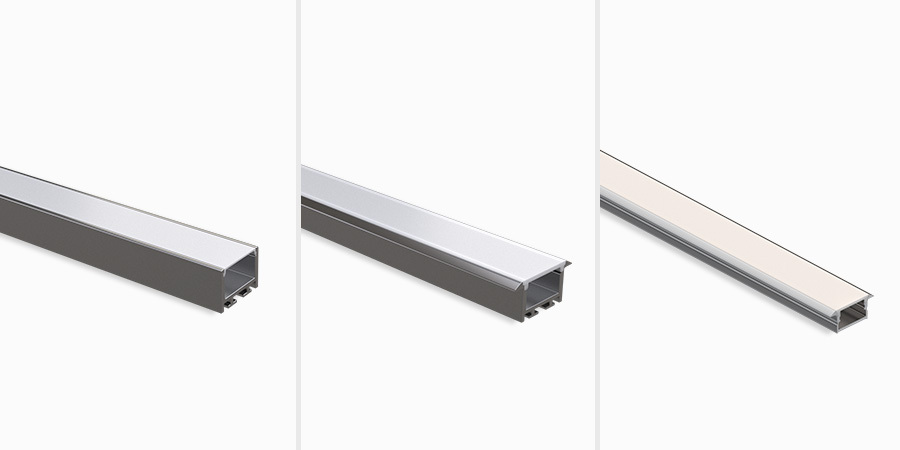
These are what take your install from DIY to a truly professional design. Aluminum channels hold your strip in place, help dissipate heat, and make more refined, recessed installations possible—think shelves, mantels, or grooved accent wall details.
Most importantly, they let you add a diffused cover, transforming dotted looks or hot spots into a smooth, continuous line of light (especially crucial for indirect lighting within a cove, under a shelf, etc). Once you've seen the difference side by side, it's hard to go back.
5. LED Light Strip Connectors (Optional)

Connectors make installations cleaner and more flexible, especially around corners, gaps, or tricky layouts. Instead of forcing sharp bends or soldering everything, you can neatly route your light strips exactly where you want them. They're particularly useful behind TVs or under furniture, where space is tight and precision matters.
Pro tip: Even if you plan a straight run, having a few connectors on hand can save you if something doesn't go exactly as expected mid-install.
6. Alcohol Wipes & Cleaning Equipment
This might sound minor, but it's one of the biggest causes of failed installs. LED strips rely on adhesive backing, and dust, grease, or even invisible residue can prevent them from sticking properly. That's especially true in living rooms—think dust inside display cabinets, on top of shelves, or under coffee table tables.
The key is to wipe your surface thoroughly and let it dry before installing. It takes a minute, but it's the difference between a strip that stays put for years and one that starts peeling off after a week.
7. DIY LED Strip Light Installation Resources & DIY Guides (Optional)
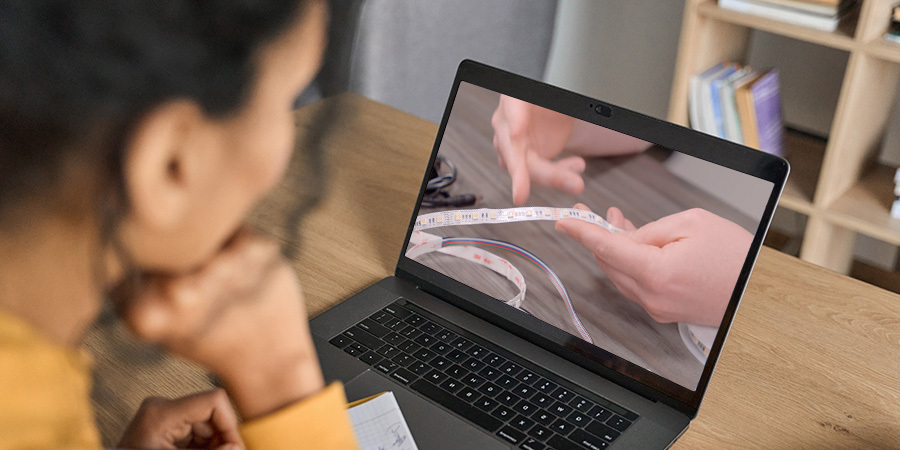
From online resources that help you troubleshoot issues during installation to curated video libraries from lighting experts, there's a whole "digital toolbox" available to you. Alongside the instruction manual and your own hands-on experience fixing things at home, these resources can make a real difference when putting together your living room lighting.
That's one of the best things about taking on projects today: so much of it comes down to seeing, learning, and repeating.
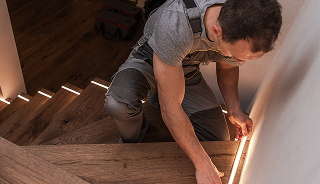
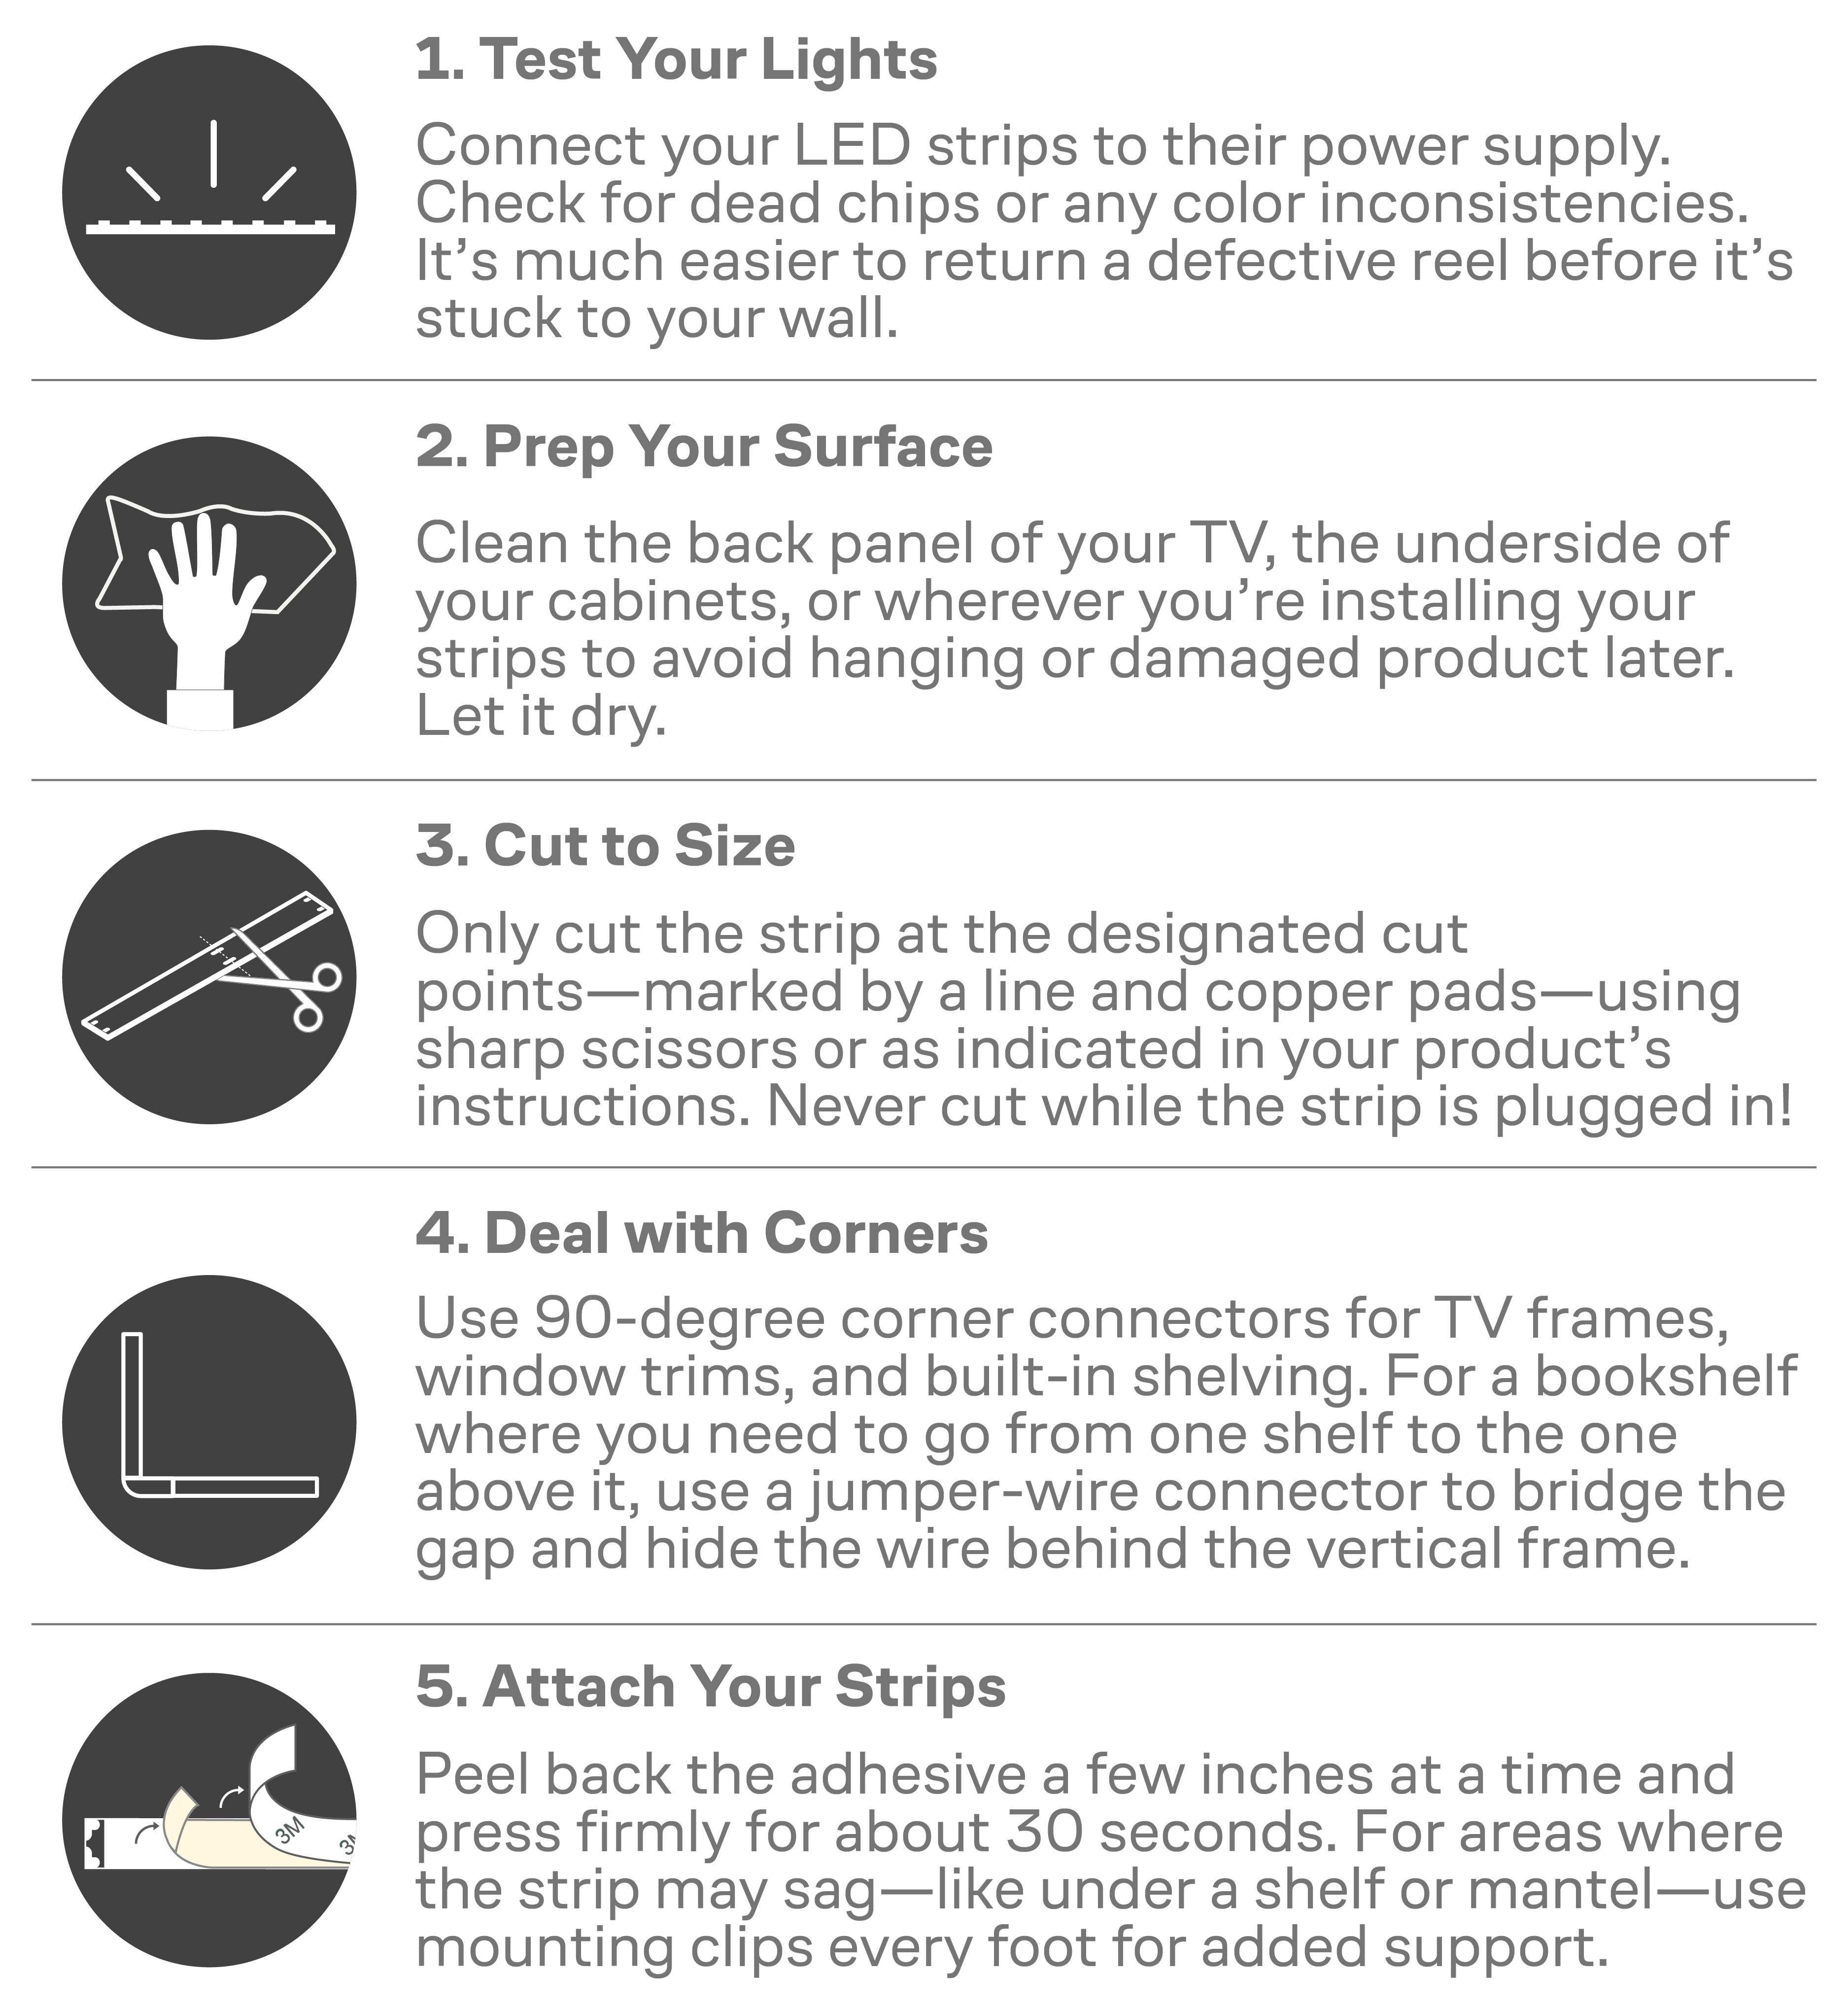
Phase 3: Install Your Living Room Lighting (Step-by-Step)
In a living room, the goal isn't just to get the lights to turn on—it's to make what produces the magic disappear. When done right, the hardware is so well hidden that your guests are left wondering how your bookshelves or media console seem to glow on their own. That quiet, seamless effect is what defines a modern living room, and it all starts with a thoughtful, well-executed lighting setup.
Follow these LED installation steps to create a striking strip lighting project in your space:
Phase 4: Enjoy Your Living Room Lighting!
After covering these general guidelines, it's time to actually enjoy your living room's new LED strips. Whether you're watching the next World Cup matches, reading on a quiet weekend, or roasting marshmallows by the fireplace, your lighting should be ready for it all.
And even better: If you went with high-quality, premium products, you'll always have reliable support behind them—so if anything ever comes up, you're taken care of. Just like a great living room, it's all about feeling comfortable, supported, and right at home.
