


Smart LED Controller Tech for Lighting Pros: Flexfire White Paper
Explore pro LED control methods like 0–10 V dimming and PWM modulation for DIY linear lighting, plus basics on DALI, Matter, Thread, and Zigbee.
By Camila Barnes, Relumination (relumination.com)
A smart light controller is any control strategy that translates user intent into predictable dimming, scenes, and schedules across LED strips and linear fixtures. To that end, professionals and advanced DIY installers want reliable dimming without complex commissioning.
The Case for Simpler Smart Light Control
This white paper focuses on the control methods you actually deploy most—0–10 V and PWM—and explains when to consider DMX for larger, scene-heavy spaces. At Flexfire, we provide wiring patterns, device selection tips, and commissioning checklists to help projects move smoothly from quote to handover.
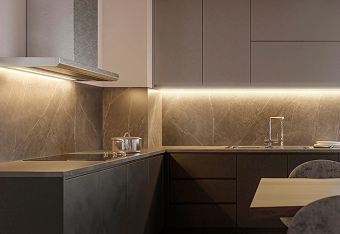
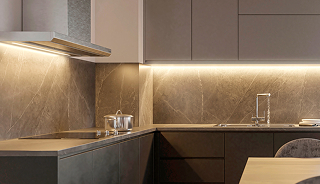
Why it matters: LED strip installations increasingly extend into offices, retail, and hospitality, where flicker, color shift, and noise become noticeable quickly. Choosing the right control backbone first prevents expensive rewiring later. In this guide, you’ll find quick wins, gotchas, and BOM templates that match Flexfire’s easy-to-install philosophy.
Lighting Control Systems You Actually Use

To start, we’ll focus on the control methods most commonly used in Flexfire-style projects. Go with 0–10 V for broad compatibility, use PWM when drivers/controllers are integrated with the strip ecosystem, and consider DMX where scene density or channel count justifies it.
Each method includes pros, cautions, and a verbal description of the wiring sketch so field teams can visualize it before pulling wire. For projects that benefit from expert review, consider working with an independent lighting controls commissioning partner to validate layouts before ordering.
0–10 V Dimming: The Default Workhorse
0–10 V dimming is an analog control method that sets light output by driving a low-voltage control input on the LED driver between 0 and 10V. It offers wide vendor compatibility, easy troubleshooting with a multimeter, and stable results when cabling and grounding are done correctly.
This method is suited to most single-color or tunable-white builds where you need predictable fades and straightforward maintenance. For a broader background on connected lighting behaviors and limits, the U.S. Department of Energy provides useful guidance, and field notes and best practices are as follows:
- Pull shielded, low-voltage control cable separate from mains, maintain polarity on the control pair, and home-run to the controller when in doubt
- Ground the driver per the manufacturer's guidance, and avoid running the control next to high-EMI conductors over long distances.
- Verify the driver’s minimum dim level and trim the controller so the lights never drop into unstable regions that cause flicker.
- Use a single control reference per zone to avoid ground loops, and test with a bench supply if the controller output seems suspect.
- For tunable white, confirm each channel’s control range and match it with the driver’s capability to maintain CCT consistency.
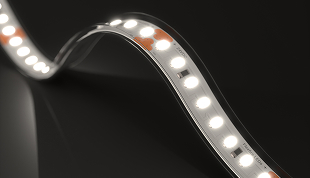
PWM Dimming, Direct & Precise for Strip Lighting

PWM LED dimming is a pulse-width modulation technique that controls current by switching it on and off rapidly to set effective brightness. This method excels in strip-centric builds where controllers speak directly to amplifiers or decoders that feed the LED channels.
When frequencies are high enough, output is smooth, and channel repeatability is excellent across zones, with implementation guidance focused on proper setup and testing:
- Select PWM frequencies above visible flicker thresholds and above camera-critical bands for hospitality and retail installs.
- Right-size power supplies and amplifiers for channel current with at least 20% headroom and provide ventilation in enclosed coves.
- Keep control leads short and grouped; avoid ground bounce by using adequate return conductors and star-ground topologies.
- Use decoders with galvanic isolation when mixing control ecosystems or when long runs are unavoidable.
- Document channel mapping early so installers do not cross outputs and invert scenes at punch list time.
DMX Lighting Controller: When Light Scenes & Channels Multiply
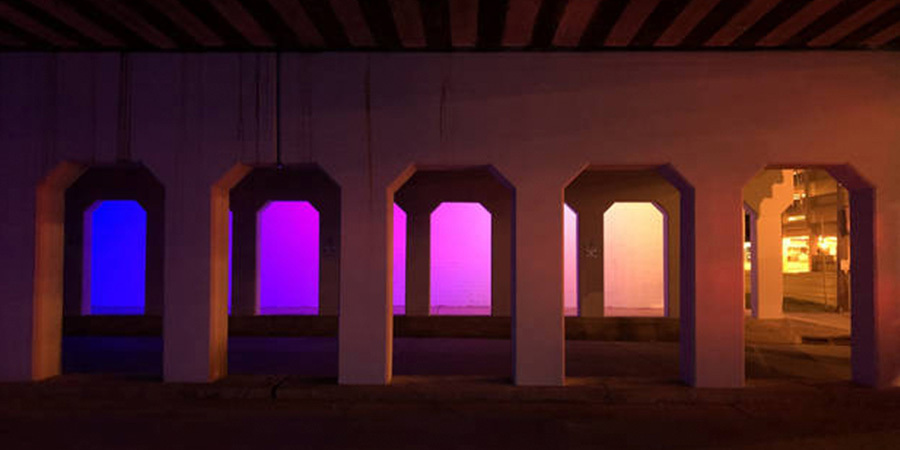
DMX lighting is a digital control protocol that transmits channelized levels over a differential link, enabling large installations to reliably orchestrate many zones and scenes. Use DMX when the project calls for dozens of zones, theatrical fades, or synchronized color effects that exceed the simplicity of 0–10 V and PWM-only layouts.
Modern DMX nodes and decoders are compact, affordable, and support RDM for device discovery. These design choices keep DMX simple:
- Use proper RS-485 cabling with termination at the last device, and mind the maximum node count per universe.
- Plan universe allocation in the submittal; reserve headroom for late adds, and ensure address maps are posted inside panels.
- Opt for decoders with isolated inputs and UL listings appropriate for the environment; avoid no-name imports for critical spaces.
- Leverage RDM to discover devices and read status, then lock addresses to prevent accidental changes during service.
Easy Lighting Solutions, Uncomplex Commissioning
Commissioning is the process of verifying wiring integrity, device configuration, and scene behavior before occupancy. A lean but methodical approach prevents callbacks and aligns with a DIY-friendly brand because steps are repeatable and visible.
Make measurement your friend and keep changes in small, tested increments. And when scoping control intent and documentation, the DesignLights Consortium on Networked Lighting Controls provides practical guidance that aligns with checklist-driven commissioning—use the following steps on every project:
- Power & Polarity: Confirm supply voltages under load and verify polarity to every controller, decoder, and strip.
- Control Sanity Check: Inject a known 0–10 V signal and observe range; for PWM, verify the channel frequency and duty with a meter or scope.
- Fixture Grouping: Test each zone independently, label returns and feeds, and photograph panel terminations.
- Scene Programming: Start with baseline scenes, set trims to avoid bottom-end flicker, and save configurations.
- Flicker Audit: Use a phone camera slow-motion check as a quick pretest, then validate critical spaces with a flicker meter if specified.
- Thermal & Airflow: Measure driver and decoder temps after a 30-minute burn-in; adjust enclosure ventilation if above spec.
- Handover Packet: Export configurations, address maps, and warranty info; store a copy with the as-builts.
Troubleshooting LED Lights: Fast Fixes for Common Symptoms

Even clean designs encounter field surprises. The best response is a short list of high-yield tests that isolate causes in minutes.
Focus first on power quality and terminations, then on control integrity, and finally on device configuration. Document the fix so future calls resolve faster. Here are quick wins by symptom:
- Faint Glow When Off: Check for leakage on 0–10 V lines, use proper sinking controllers, or add bleed resistors per driver guidance.
- Bottom-End Flicker: Raise the minimum level trim or increase the PWM frequency, if supported; verify the driver dimming curve.
- Uneven Brightness Across Long Runs: Feed from both ends, increase wire gauge, or segment with additional power injection.
- No Response on A Zone: Verify addresses or channel mapping; swap in a known-good decoder to isolate.
- Audible Coil Whine: Increase the PWM frequency or select drivers rated for silent operation at your duty range.
Bill of Materials Templates You Can Reuse
A consistent BOM template accelerates quoting and reduces field surprises. Adjust the placeholders to match your preferred SKUs and panel form factor, and list every control component explicitly so substitutions don’t slip in during procurement. For each zone or panel, include:
- LED driver or power supply with a margin for continuous load and ambient conditions
- Controller or dimmer (0–10 V, PWM, or DMX node) with mounting accessories
- Amplifiers or decoders if the channel current exceeds the controller output
- Low-voltage cabling, terminations, labeling materials, and protective devices
- Enclosure or panel hardware with ventilation and service clearances
DALI Protocol Lighting & Beyond: Ecosystems at a Glance
DALI, Matter, Thread, and Zigbee are digital ecosystems that coordinate devices across a building or home network. But even though they’re powerful in the right context, they can exceed the needs and skills of small, fast-paced lighting projects. Treat them as integration options when a specification demands them, not as defaults for simple strip-lighting jobs.
Here’s when to consider them and when to skip them:
- DALI: Consider for commercial specs that require fixture-level addressability; skip for small retrofits where 0–10 V is enough.
- Matter or Thread: Consider for consumer ecosystems; skip when reliability and deterministic behavior are key.
- Zigbee: Consider if a mandated gateway exists; skip in RF-noisy environments without qualified commissioning support.
Flexfire Pro: How We Can Help Lighting Professionals
Need a sanity check on a control layout or a BOM review before ordering parts? Our pro-focused services include design reviews and commissioning support for complex scenes or large multi-zone jobs. Ask for a PRO review, and we will return a marked-up diagram with risk notes and suggested products.
About the Author
Camila Barnes is a guest contributor who helps teams design reliable, easy-to-install LED control systems. Her work focuses on translating advanced control concepts into field-ready checklists and diagrams.
