How to install solderless connectors for LED strip lighting:
Solderless connectors make it very easy to install LED strip lighting. While soldering provides the most stable connection for the LEDs, our solderless connectors provide a strong connection without the extra work.
Quick Installation Guide (please read!)
Although soldering is the best way to maintain a long lasting connection, the solderless connectors are a great way to get your project going quickly. When installed correctly, the connectors should not be loose and should provide a secure connection.
Single color solderless connector installation
Solderless Connector Connection Guide
Single color LED strip lights, view the installation process below
Video 1 - How to install an LED strip light to a solderless connector
Video 2 - How to connect an LED strip light kit with solderless connectors
How to install Solderless connectors for LED strip lighting:
- Cut along the mark line, and tear a little bit of 3M backing tape from the mark.
If 3M tape is not peeled off a little, it will be harder to insert the strip into the connector.
- Lightly pull the black plastic lock out from the solderless connector. Pulling too hard may damage the LED solderless connector.
- Insert strip into the solderless connector. There are two sides to the connecting tray – make sure the wider of the white sides faces up. This is the top.
- Make sure the soldering pads fully touch the conjunction metal.
- Push the plastic lock back towards the middle into the lock position. Be gentle and make sure the mounting tray is securely closed or the lights will not light up. Double check the markings of (+) and (-) to make sure which color wire corresponds to each.
- For long term use, try and use liquid tape or a bonding material to make sure the connector does not become loose.
LED Strip Light Photo Install Tutorial
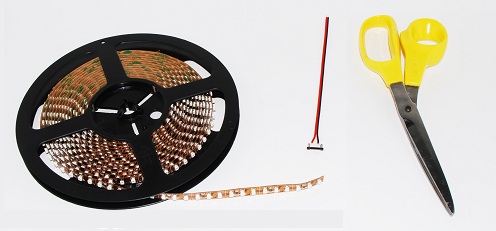
Step one: Materials Needed
Have all your materials ready. You will need scissors, LED flexible strip lights, a solderless connector, ruler (if needed), and a set of hands.

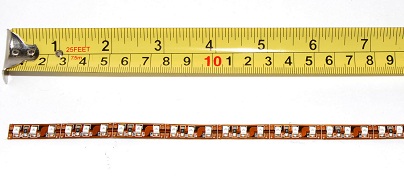
Step Two: Measuring how many feet of LED strip you need
You may have your LED strip light sent to you in a reel (16 feet) or by the foot, depending on the quantity ordered. Decide how much flexible LED strip lighting you will need for your project. Since the LED strip can only be cut every third LED, you may have to go slightly over or under your desired specification.

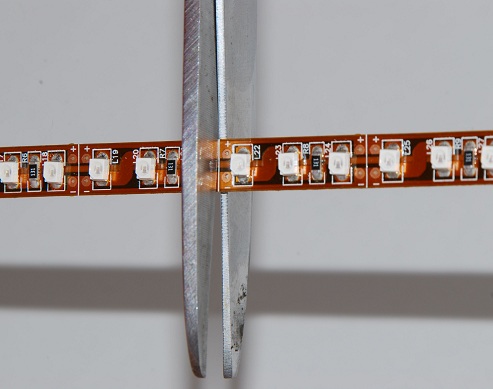
Step Three: How to cut the LED strip
As you can see below, the flexible strip light can only be cut along the designated lines. Take a sharp pair of scissors and cut along the line.

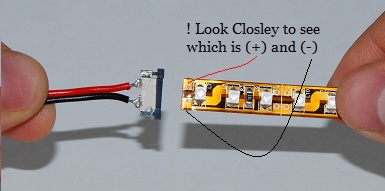
Step Four: Pay attention to positive and negative markings
IMPORTANT: Notice the positive and negative sides of the LED strip light. This is important for the next few steps. Sometimes when you cut the LED strip light , things can get mixed around.

Step Five: Introduction to the solderless connector
Each Solderless Connector has two sides. To insure you have the correct side up, make sure the wider of the white sides faces up. This is the top.
BE GENTLE and pull the locking device out away from the wires. Do not pull on the wires to do so, as the solderless connector is fragile.

Step Six: Attaching the solderless connector to the LED strip
IMPORTANT: Color does not always matter! Make sure you follow the positive side of the flex strip down through the solderless connector wire to the power supply. Red/black can either mean (+) or (-) depending on what side you have hooked the connector to.

Step Seven: Securing the tray to the LED light
In the example below, if we were to attach the Solderless Connector to the other side of the flexible strip light, the red would be negative and the black positive.
Next, GENTLY secure the locking tray back in place, connecting the terminals of the LED flexible strip light to the connector. Be gentle and make sure the mounting tray is securely closed, or the lights will not work.

Step Eight: Connecting the LED strip to power
You are now ready to plug in your LED Flexible strip light to the LED power supply.
This can be done a few ways.
1. Wire Nuts
2. Butt Splices
3. Terminal blocks
4. DC Coaxial Connectors with or without screw terminals
Match the positive and negative markings with the positive and negative wires from the power supply. Make sure the power is off when you do this.
If your strip lights do not light up:
- Wire color does not always matter! Make sure you follow the positive side of the flex strip down through the solderless connector wire to the power supply. Red/black can either mean (+) or (-) depending on what side of the LED flex strip you have hooked the connector to.
- Another common problem is that the solderless connector may be installed upside down; repeat steps above and try again.
- Also, MAKE SURE the tray is closed all the way. Be gentle!
- Check your power supply and make sure it is hooked up properly, with correct (+) and (–) as well.
- Are you using 12v LED strips with a 24v Power supply? This will not work. Make sure the power unit.
- How many feet of LED strip are you using vs how large your power unit is? If you are using 1 reel of 24v Ultra bright with e 2.5amp power unit, it will not work because the power unit is too small.
Contact us with any questions about installation or product selection! We can help.

