


How to Install Solderless Connectors for LED Strip Lighting
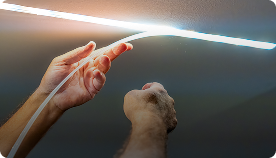
Install Solderless LED Connectors Like a Pro
Solderless connectors are every DIYer’s favorite tool. No more worrying about how to solder or investing in expensive equipment just to install LED strips. It’s time to snap your strips tight into place and save on time and effort to enjoy your lights!
Why Use Solderless Connectors?
Thanks to the flexibility of LED strip lights, no install ever goes exactly by the book. Maybe there’s a challenging corner, a gap to fill, or just a little extra stretch to cover. We made our solderless connectors for moments like these.
With hooks made to pierce the strip and high-quality conductive materials, all you need is a steady hand and a pair of pliers to create custom projects tailored to your needs and style.
How Do I Install Solderless Connectors?
Whether you’re soldering or taking a shortcut with our solderless connectors, the goal of any successful project is the same: keeping electricity flowing smoothly and making sure your lights shine steady and bright.
In a few simple steps, we’ll show you how to keep your connectors tight and your connections secure every time. Follow along below and watch our DIY install video guide to see it in action as you go:
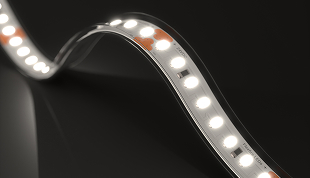
Preparing Your LED Strip Lights for Connection
1. Check Your Components
Before starting your project, make sure you have the right products and inspect them for any defects. Try a mock installation by laying out the lights and connecting them to the correct power supply. Double-check that the color temperature and type match across all your LED strips. And remember: Test each connection as you go to make sure everything works perfectly.
2. Cut Your Strip to the Desired Length
Next, decide how long you want your LED strip to be and measure carefully for precise cuts. Using sharp scissors, cut the strip only at the black cut marks located between the copper solder pads. Make sure to cut on the copper pads, not on the solder joints.
Keep This in Mind:
When installing connectors on some LED strip lights*, you’ll need extra copper pad space. Cut both solder pads so the strip section has enough surface area to fit securely into the connector head.
*Accent™
*Accent™ Tunable White
*Architectural™ Tunable White
*Sienna™ Dim-to-Warm
*RGB 600
Avoid installing connectors directly on the solder joints. These pre-soldered points appear every 50 cm and are used to connect the strips during manufacturing.
Do not bend LED strips sideways (horizontally). They are designed to bend vertically only.
3. Check Polarity Before Installation
Make sure your LED strip’s polarity matches that of your power supply. Follow the positive (+) markings from the driver through the entire strip to align with the correct terminals. If the positives (+) and negatives (–) aren’t matched, the strip won’t light up.
4. Remove Part of the Adhesive Backing
Carefully peel off about ½” to ¾” of the 3M adhesive (both the tape and release paper) from the back of the LED strip before placing it into the connector. You can use a small blade or your nails to do this. For outdoor strips, peel off about 2” of adhesive.
Setting Up Your IP20 Indoor Grip Connectors
1. Open the top of the grip connector and insert the LED strip, making sure the strip faces up towards the translucent top. The solder pads should align directly above the connector’s small hooks.
2. Use 20 or 22 AWG-stranded wires. No need to strip them—the connector’s hooks will pierce the insulation to contact the copper wire inside.
3. Once everything is in order, use pliers to close and lock the connector. You’ll hear a click when it’s firmly closed.
4. For jumper (strip-to-strip) connectors, repeat steps 1–4 on the other side.
Snapping Grip Connectors onto Wires
1. If you're using a grip connector with no wires, open both sides to identify the strip and wire ends. The side with the flat surface is for the LED strip; the other side, with bottom indentations, is for the wires.
2. Use 20 or 22 AWG-stranded wires. No need to strip them—the connector’s hooks will pierce the insulation to contact the copper wire inside.
3. Fully insert the wires into their individual indentations*, making sure they fit tightly.
*Wire Placement Reference by Strip Type and Width:
-
- Single Color (8 mm): 2 indents
- Static White (10 mm): 4 indents (use the two outermost)
- Dynamic Tunable White (10 mm): 3 indents
- RGB (10 mm): 4 indents
- RGB + White (12 mm): 5 indents
4. Test your LED strip by connecting it to your controller, dimmer, or power supply.
Setting Up Your IP65 Outdoor Grip Connectors
1. Open your silicone sealant and apply generously inside of the LED strip’s silicone sleeve, at the cut point. Ensure that it is completely sealed.
2. Slide the clear portion of the IP65 grip connector into the silicone sleeve. Make sure both the window of the clear case and the LED strip face upward.
3. Make sure the strip is properly aligned and flush with the top of the connector. Wipe away any excess sealant.
4. Take the white plastic part of the connector and push the metal contacts through the window of the clear case using pliers. You should feel or hear a click as the contacts pierce through the solder pads and lock into place.
5. Let the sealant cure according to the product instructions.
6. If you’re using a jumper connector, repeat all the steps above on the other side of the connector.
7. Finally, seal the far end of the IP65 strip using silicone and the appropriate end cap to ensure full protection.
Troubleshooting & Contact
Check out our quick fixes on any connector-related LED strip lighting issues. If you still need help or want us to help you select the right connectors, reach out—we’ve got you covered, just like always.