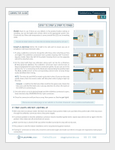
How to install and control RGB color changing LED lights
Skill Level Needed: Beginner/Intermediate
Note: ALWAYS consult an electrician before doing any electrical installations. This is a guide, and is not to be used as a replacement for a licensed electrician’s services.
Installing RGB color changing LED light strips is a relatively easy task. Below are the items you will need:
1. RGB color changing LED strip light at desired length
3. RGB LED Solderless Connectors
4. LED Strip Light Power Supply
5. Optional: DC Coaxial Solderless Connector
Right-Click to download - RGB Solderless Connector Installation Sheet
Choosing the correct LED power supply:
Our RGB LED strip light uses 12 volts and 2.2 watts per foot. So, if you want to install 13 feet of RGB color changing LED light strips you will need a power supply to handle 28.6 watts. Remember, watts divided by volts equals amps. So a simple computation will tell you which power supply you need.
So: 28.6 watts / 12 volts = 2.38 Amps
You typically need to use a power supply that has a max load 20% larger than the load you need to make sure the unit does not overheat, and functions efficiently. You would need a 4-amp power supply for the above example.
More information is available in our LED Power Supply section.
Long Distance RGB Installations with Amplifiers
Installing the LED RGB color changing strip light to the control box
From the RGB remote, you will need to connect the LED RGB solderless connector or some extra RGB wire. Make sure you strip the plastic off of the wire to expose enough bare wire to make a secure connection. Use the screw terminals to tighten the wire down. Make sure you look to see that the (+), R, G, and B markings on the strip are matching those on the RGB control box.
Once you have the RGB lights hooked up, it is time to install the control box to the power unit. There are two terminals to hook up the (+) and (-) DC inputs from your power unit. Make sure the power is off when you install the driver.
Once connections are double checked, turn the power on and use the remote to control the LED strip lights.
If your lights do not light up:
- Wire color does not always matter! Make sure you follow the positive side of the flex strip down through the solderless connector wire to the power supply. Red/black can either mean (+) or (-) depending on what side of the LED flex strip you have hooked the connector to. For RGB installs, Make sure you have the connectors on the right way and the right colors are connecting to the right terminals.
- Another common problem is that the solderless connector may be installed upside down; repeat steps above and try again.
- Also, make sure the tray is closed all the way on the solderless connectors. Be gentle!
- Check your power supply and make sure it is hooked up properly, with correct (+) and (–) as well.

